My blog has moved!

You will be automatically redirected to the new address. If that does not occur, visit
http://www.ellesnewenglandkitchen.com
and please update your bookmarks.

Friday, June 26, 2009

My Blog is on the move…

I'll be officially closing my Blogspot blog sometime next week. I loved my home here, and have a lot of good memories--it's where I first started blogging, after all. But I was ready for a change. Squarespace is a great new home for my blog! The people behind the scenes are extremely helpful. And when you ask a question, you get a quick answer. From a real person. Huge, in my  book! If you're at all curious, check out their free trial! There's no catch.   Plus, they have a lot of built in features to offer.   I can change my site design, add extra columns, change the widths of the columns, add extra pages (archives, about, etc), and lots more--all with a few easy clicks!

Here is the link to the new site--it’s just about ready.   Just a few more behind the scenes details.

Please remember to subscribe to the RSS feed for this new blog if you're currently subscribed to the old one, and if you're not--now's your chance. ;) That way you won't miss any posts!   For those of you that subscribe by email, I’ll get Feedburner email services running there asap (probably right after I post this, hehe).  You’ll have to subscribe again, since the site address is different, but there shouldn’t be any problems. 

Thanks to all of you for reading my blog.  I hope you’ll join Elle’s New England Kitchen at it’s new home!

cherries-2

Stumble Upon Toolbar

Monday, June 22, 2009

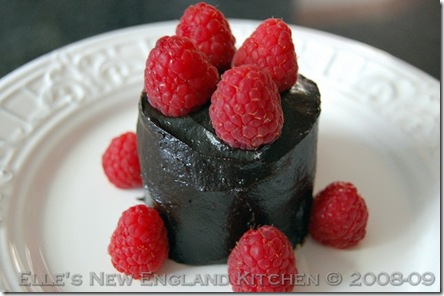
Raw Food, Part 3: Raspberry Ganache Fudge Cake

You are all going to LO-V-E this one. If this is the first time you dip your toe into the raw food waters, then let this recipe be the one you try. You will not believe how good this is. It’s from Ani Phyo’s new book, Ani’s Raw Food Desserts: 85 Easy, Delectable Sweets and Treats.

raw-chocolate-ganache-cake-3

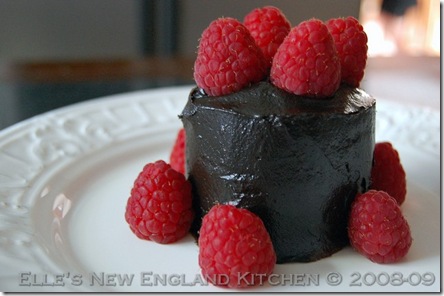
Think of the most fudgy, chocolaty, rich cake, covered in a delicious, dark ganache.

Are you thinking of it? It’s a nice thought, right? Now, think of all of the cream and chocolate, butter and sugar. Do you really want to eat those things? I’ve got to be honest, if you’re like me, you do! But you don’t want to feel the guilt after you do. You also most likely don’t want all of the empty calories and bad fats. Here is an excerpt from an interview with Ani Phyo, by way of Crazy Sexy Life:

“Let’s take my Raspberry Ganache Fudge Cake as an example. The cake is made with walnuts, considered a super food by the FDA for it’s high levels of omega-3. Walnuts provide amino acids, vitamins E, A, calcium, iron, and have been found to keep our blood cholesterol levels in check. Walnuts are mixed with raw cacao powder, which is defined as a superfood by the FDA for it’s high levels or antioxidants, which fight free radical damage, premature aging and illness. I use dates, a whole food fruit, to sweeten and to bind together the nuts and cacao powder into a flourless cake texture. Dates are full of fiber, potassium, vitamins, minerals, and antioxidants. All of the ingredients in my cake are good for you super foods.

On the other hand, the baked version uses bleached white flour that’s been stripped of any nutrient value. It’s sweetened with refined white sugar and empty calories, and uses eggs and butter, which contribute to high cholesterol levels. The baked version doesn’t offer much nutritional value.”

Plus, avocados are good for you. So you don’t have to feel one bit of guilt eating this icing!

I only had to make one substitution, and that was in the icing. I had just enough cacao to make the cake, and had to use regular cocoa for the icing. But the rest of this cake is completely raw. In the recipe, they don’t specify raw walnuts, but that’s what I used. If you don’t use raw, it’ll still be delicious, but technically not raw.

raw-chocolate-ganache-cake-2

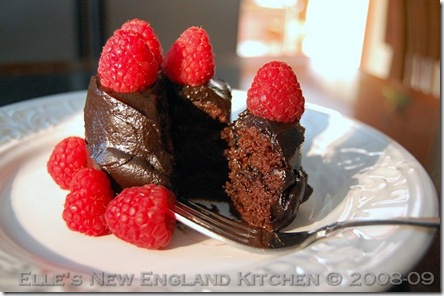
Do you remember that dark, rich chocolate cake covered in ganache that I asked you to think about? Guess what?! You can have that cake! And you can eat it without an ounce of guilt, because Ani’s version is packed with things that are good for you. But when you’re eating it, you may feel that “knee-jerk guilt” reaction like I did. Because it’s that good. I’m serious!

This recipe got eight thumbs up from the kids, and four more from my husband and I. I hope you’ll try it! You won’t be disappointed.

raw-chocolate-ganache-cake-4

Oh! For easy serving, and no messy cake slicing, I made this recipe into eight cupcakes. Just divide the “batter” into about eight equal portions, and press into a cupcake pan. A little chill in the fridge (about 5 minutes), and a nudge with a knife, and they easily come out. And while we’re on the subject, when mixing this up in the food processor, let it go until you can’t see bits of the nuts anymore. I also gave it an extra squirt or two of raw agave. You may see some of the walnut oil coming out, but just go with it, and press them into the pan, or into 2 cake layers. **For these photos, I stacked two cupcakes like a layer cake, with icing between. Find the recipe by clicking here! And in case you’re wondering, you can’t taste the dates, or the avocado.

This is the most decadent chocolate cake you’ll ever “uncook!”

raw-chocolate-ganache-cake-5

Stumble Upon Toolbar

Thursday, June 18, 2009

Cashew Toffee Cookies

You know you want these! When you have that first bite, you’ll know it was meant to be. When you bake them, you’ll thank me. Or, you may hate me--because these are hard to stop eating.

I bought this tub of little cookies at Trader Joe’s months ago. In fact, I made these months ago, but I’m just getting around to posting them now. You know how it goes. You make something, take the photos, eat or give away all of the goodies, and the cycle begins again. Before you know it, you have a bunch of recipes and photos sitting around, waiting their turn. Plus, life happens and you’re busy, maybe you can’t get to your blog as much as you’d like. My train of thought has left the station…

Back to the cookies! I can’t remember what the Trader Joe’s cookies were called, but oh my gosh, were they good! Bits of cashew, pockets of caramel, crunchy cookie. I’d guess they were called something along the line of Caramel Cashew Cookies. See how I made that connection? ;)


I wanted to try to make them at home, and figured it couldn’t be too difficult. And as it happened, I’d picked up the April edition of Everyday Food. There was a recipe in it for Pecan Sandies that had all of the flavors I was looking for in the cookie base, so I ran with it. And don’t believe the reviewer on the site that said the recipe needed an egg, it doesn’t. It’s basically a shortbread cookie, which doesn’t need an egg. (Yes, I know, my mom’s shortbread does use an egg, but it’s an old family recipe, and I’m not messing around with that one. It’s untouchable, like most treasured family recipes are, right? Plus, my mom loved it, and she’d be thrilled that I shared it with all of you.)

I didn’t change much in the recipe, but I did double it. Because if you’re making cookies, why would make only 18 of them? And I increased the salt, to play off the sweetness of the toffee bits. mmmmm….


Bonus! There’s no egg in this, so if you’re inclined to eat raw cookie dough (and seriously, who isn’t?), then this one’s for you.

Cashew Toffee Sandies

1 cup (2 sticks) unsalted butter, at room temperature
1 cup packed light-brown sugar
3 teaspoons vanilla extract
1 1/2 teaspoon salt
2 cups flour
1/2 cup cashews, coarsely chopped
1 cup toffee bits (like Heath)


Heat oven to 350. In the bowl of your mixer, beat the butter and sugar until fluffy.
Beat in the vanilla and salt.
With the mixer on low, gradually add the flour, mixing until combined.
Fold in cashews and toffee bits.


Roll the dough (it's really easy, not sticky!) into 1 1/2 inch balls, and place them on parchment lined sheets.
Wet the bottom of a glass, and lightly flatten the dough balls. (you'll need to re- wet the glass a few times.)
Bake 15-17 minutes, or until golden brown. If you put more than one sheet at a time in the oven, rotate them halfway through baking time.
Cool on wire racks, and store in airtight container.
Makes about 36 delicious cookies.

Stumble Upon Toolbar

Friday, June 12, 2009

Funky Chunks Gift Basket Giveaway--Winner Announced!

funky-chunks-5

Congrats, Rachelle! And thank you to everyone that entered and retweeted about the giveaway!

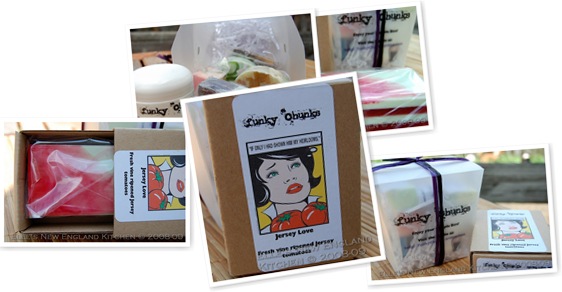
It’s time for a giveaway! Michele from Life, Lightly Salted has started a bath and body company called Funky Chunks. She has some very cool soaps and equally cool packaging! Add to that that she’s very creative and a sweetheart, and you’ve got a winning combination. You can also check out her soap blog called Funky Chunks for news and new items. We have a winner! Rachelle, from Mommy, I'm Hungry has won the basket.

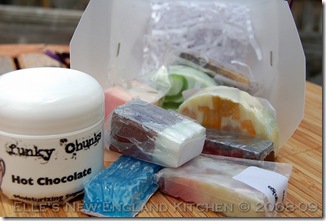
Anyway, Michele contacted me last week to see if I’d like to host a giveaway for her. Um, hell, yes! So she immediately got some samples in the mail for me to check out. Not only are they in cool packages, but they look, smell and feel great! My favorite has to be the Hot Chocolate Sugar Scrub, and the Pucker! The Pucker! is an herbal dill blend that smells so fresh and clean. But the Tuscan Summer smells great, too. Really, they all do!

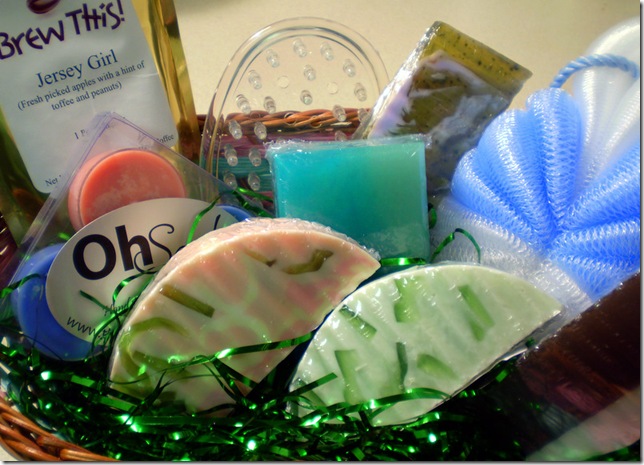
So what do you get? A basket with a $30 retail value, including, from Funky Chunks:

  • 4 full size Chunks of Tuscan Summer, Pucker!, Sweet Basil and Root Beer Float
  • 1 Sample Chunk of Green Tea Zen, a soap dish and a big bath scrubbie.

And bonus! Janine, the owner operator of Things That Make Scents has thrown some stuff in, as well!

  • Brew This! coffee - Jersey Girl flavor (apples, toffee and peanuts)
  • Tea light candles in Melon Mania and Blue Sea Glass scents (descriptions HERE )

Michele let me know she may toss a few extra things in there, too--so that’s an extra bonus.

I took a few photos of the samples Michele sent me. I thought you may want to see her products and packaging:

Here is a photo of the Gift Basket:

funky-chunks-gift-basket

To enter!

1) Visit Funky Chunks and have a look around. Come back and tell me which soap you’d most love to try. Leave it in a comment here for one entry.

2) Visit Things That Make Sense. Take a look around, pick a candle scent that you love, and leave another comment here letting me know which one it is--for a second entry.

3) Tweet about this giveaway, come back here, and leave your Tweet link in your comment--for a third entry.

4) You can Tweet about this giveaway as much as you like, for additional entries. Just leave your Tweet links in your comments, please! (When you Tweet, click under your message where it says, for example, One Minute Ago, and it will take you to a page where you can copy your Tweet’s link.)

5) DON'T forget to leave a valid email address!

This gives you a ton of chances to win the gift basket!

Open to US entrants only on this one. Winner will be chosen next Friday. But in the meantime, get your butts over to Michele and Janine’s sites and make your wish lists!

Guys, you should enter, too! If you win, share the basket to your favorite girl!


And taking care of a little business: MySpiceSage is now offering 50% OFF the Ultimate Fathers Day Gift Set that includes Ten 1 Cup Bottles of Gourmet Spices and Seasonings perfect for dad, now $29.75! Normally, this gift set is valued at $60.25 when sold separately. Also, we are offering FREE SHIPPING for this item if ordered by 06/15/2009 AND a free personalized card for dad!


Stumble Upon Toolbar

Tuesday, June 2, 2009

Raw Food, Part 2: Raw Burgers on Raw Bread

Welcome to installment two in my raw food journey!  We’ve been doing well, considering that we’ve been “cooked food + meat eaters forever.  My husband is doing slightly better than I am.  He’s got the willpower of…I don’t know what, but he’s almost unbending in this raw food journey.  A bull!  He’s stubborn like a bull.

We’re still in the “integrating” stage, where we do a lot of raw, some vegetarian/vegan, and meat once a week.  We had some beef ribs on Memorial Day weekend that we smoked--and oh man, they were delicious and mouthwateringly perfect!  But we both felt sort of sick after eating them.  Not only bothered in our stomachs, but it felt weird not being able to get the taste out of my mouth.  Beef, I’ll miss you.  You were always such a tasty treat…hehe.  But back to the integrating--we still have some baked bread and non-raw stuff, but overall, we’re eating much healthier than we were a month ago. 

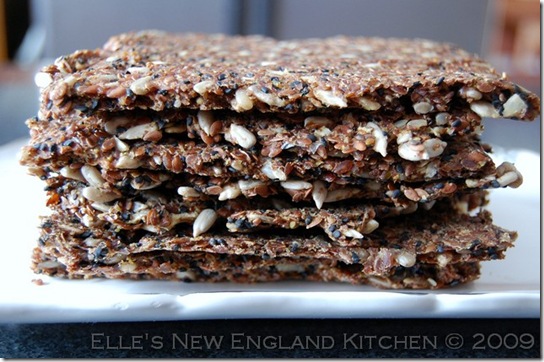
raw-flax-bread

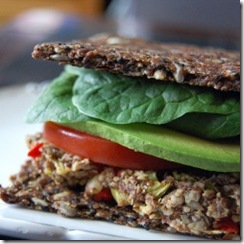
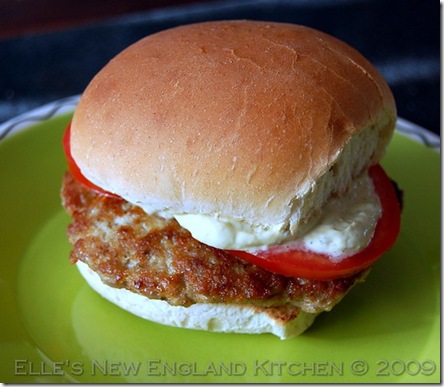
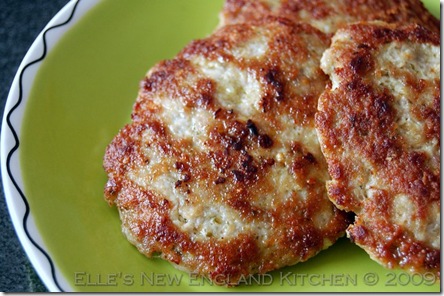
Which brings me to these raw burgers, from Ani Phyo.  They were really tasty!  Perhaps need just a bit of playing around with as far as seasonings go--I’d like to add the Weber Burger Seasoning that we always use.  Used, hehe!  And maybe a little Bragg’s Liquid Aminos.  (Which tastes just like soy sauce, only lighter, for those of you who have never tried it.)

Overall, they were really good, and we’ll have them again, for sure.  I loved the flavor that ketchup added, too, surprisingly!  I didn’t make Ani’s raw ketchup, but the one we used was organic.  They definitely need some crunch, so go ahead and pile on your crisp greens and sliced onions. 

raw-burgers-on-raw-flax-bread

I dehydrated the bread and burgers in my oven with the door propped opened, but as we prepare more and more raw foods, I am starting to see the need for and advantages of a dehydrator.  We like to have crackers and chips to snack on--and it would be nice to pop them in there and let them do their thing.  But in a pinch, the oven did the job. 

The recipe for the burgers can be found here, on Ani’s site.   And the bread recipe can be found by clicking here.  My tip--if you’re making this without a dehydrator, make the bread on parchment paper, because when it’s time to flip it, it’ll be much easier.  Then peel the paper off.  And although the bread looks cracker-ish, it’s not.  It’s very pliable.

Raw Burger Porn:

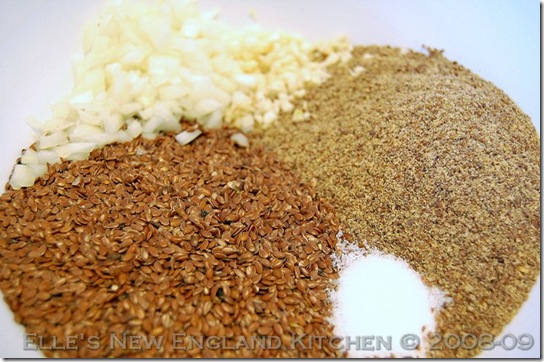
raw-bread-ingredients   

All of this healthy stuff…

becomes this super healthy bread:

raw-flax-bread 

raw-burgers-on raw-flax-bread

I hope you’ll continue on with me on my raw food journey.  It won’t be all I make and post, for sure.  I love to bake, and we’re still eating meat at least once a week, so there will always be something for everyone.

Stumble Upon Toolbar

Tuesday, May 26, 2009

Pesto Parmesan Turkey Burgers and Some New England Sights

Where to start?  I guess, with the food, since this is a food blog, right?

pesto-parmesan-burger-3

This is a quickie recipe that I whipped up a few weeks ago.  We had some ground turkey hanging out in the freezer, like it does, and I wanted something different.  Burgers are always welcome, but a little variety is nice.  A look in the pantry turned up a jar of Trader Joe’s pesto.  Bingo!  One easy recipe, coming up!

Note: We had two 3/4 pound packages of farm fresh ground turkey (one white, and one dark meat) that we combined to make these.  The farm fresh meat is very moist, so we added bread crumbs.  If your ground turkey doesn’t seem extra moist, you can skip the bread crumbs.  Bottom line--the patties should hold together, so you be the judge.

Pesto Parmesan Turkey Burgers

1 1/2 pounds ground turkey
1 1/4 cups grated fresh parmesan
1/2 cup prepared pesto
1 1/2 tsp garlic pepper rub
1/2 cup bread crumbs

Pesto Mayo

Your favorite mayo (we like Hellman's!)
prepared pesto

Mix all of the burger ingredients (except the things for the pesto mayo) in a medium bowl and form into patties.  (We got 8 for this amount)
Cook in a hot pan with a little heated olive oil, or grill for about 4 minutes per side.
For the pesto mayo, just eyeball the amounts until you get it to your liking.
Add any additional toppings you like.


 pesto-parmesan-burger-5


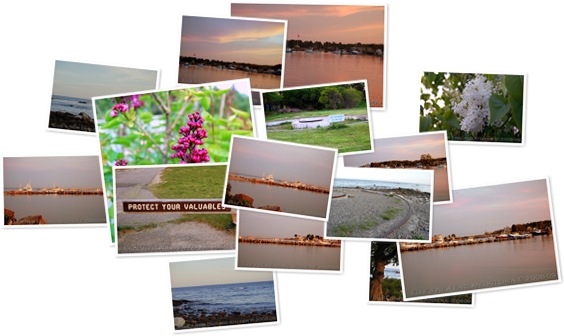
And now, some shots from around NH.  These are some taken at Odiorne Point State Park, in Rye, NH.  We love visiting here, and we’re out at the coast all the time, anyway.  The park has the Seacoast Science Center, which is full of exhibits featuring the local wildlife.  The building itself is built on and encompasses the home originally built on the land in the 1600’s.  Here is a bit of history about Odiorne Point from NhStateParks.com:

History
In the dense growth of shrubs and vines, covering much of the park's 330 acres, remnants of Odiorne's past silently remain. Reminders of other eras and stark contrasts; idyllic summer estates and gaunt reminders of coastal fortifications. In terms of man and his settlement of this coastal land, Odiorne Point remained a true wilderness until almost 400 years ago. During summer migrations Native Americans of Pennacook and Abnaki tribes visited the area which they called Pannaway. Permanent settlement began in the 1600s.

In 1623 an agent of England's Council for New England cameto fish and trade in the New World. David Thomson journeyed to New England on the ship Jonathan to establish the first New Hampshire settlement at what would become Odiorne Point. Many others followed, and the original settlement grew and spread along the coast and up the river.

John Odiorne joined the settlement in 1660. He acquired several acres of land from the shoreline west into the marshes beyond. Like the others, he farmed and fished. The Odiornes remained on the property for several generations, always a part of the continuing changes in the Odiorne Point community.

By the 1700s the settlement was well established, but the governing and trading activities had moved north into the deep harbor area of Strawberry Banke (now Portsmouth). The farms of Odiorne Point helped to feed the burgeoning port of Portsmouth for about 150 years.

After the Civil War farming gradually gave way to a colony of hotels and large summer homes. Generations of families spent their summers by the sea. In this era of large seaside resorts, a grand hotel called the Sagamore House was built on the property. Over the years smaller parcels of land were sold for summer homes and estates. Formal gardens and tree-lined drives ornamented the properties. By the late 1930s seventeen families lived on Odiorne Point, including an eighth generation descendent of John Odiorne and the last of the Odiornes to live on the ancestral homestead.

World War II (WWII) brought drastic changes to the landscape and to the lives of these people who loved their land by the sea. In 1942 the federal government purchased all the property from Little Harbor to the Sunken Forest, as well as the adjacent marshland. Within a month the Odiornes and their neighbors were gone.

Military structures were quickly built to house personnel, armaments and supplies. Massive concrete casements, often called bunkers, were constructed and camouflaged with thick vegetation. Because of their open aspect to the sea, many of the estates were demolished, and Route 1A was closed. Odiorne Point became known as Fort Dearborn, and for nearly twenty years, was part of the chain of coastal defenses that protected Portsmouth Harbor and the naval shipyard. In the late 1950s Fort Dearborn was declared surplus property. It was sold to the state of New Hampshire for $91,000 in 1961.

You can see a photo of the original house in the photo on this page.  The old  house is still there and now a part of the Science Center.   Sadly, the area was taken over during World War II and used as part of the coastal defense.  This photo from activerain.com shows one of the bunkers that is still there.

odiornepointbunker

My dad grew up on the coast, and his father had the chance to buy a very large, very gorgeous home that is still there today, for $5,000.00.  Everyone back then thought the homes on the coast would be destroyed.  Thankfully, they weren’t.  But sadly, my grandfather didn’t buy the house! 

And here are a few more photos from our trip up the the White Mountains yesterday.   There’s a couple of vista shots, and a few of only the second time in my life to see a moose up close.  We almost didn’t take the Kancamagus Highway to cut through the mountains, but I’m glad we did.  This “little” guy was hanging out on the side of the road!  I was able to get right in front of him, and then he crossed the road and went by just a few feet from us.  Being a city girl, this was very exciting!

Stumble Upon Toolbar

Tuesday, May 19, 2009

Browned Butter Blueberry Maple Muffins

browned-butter-blueberry-muffins-5

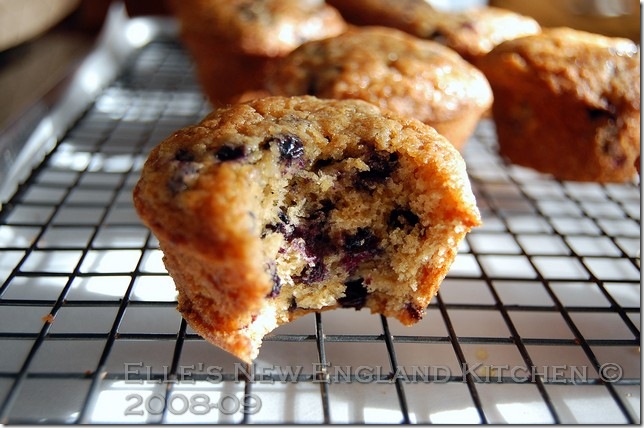
Think Blueberry Pancakes. In a nice little handheld size. And no slaving over a hot griddle making pancake after pancake. These are almost instant gratification!

Some of you may remember the Daring Bakers Cake, Caramel Cake with Caramelized Butter Frosting, from Shuna Fish Lydon. One of the best cakes ever, and the one I’m requesting for my birthday in September. It’s amazing how browning the butter makes the whole thing better. And it’s a simple step, too! Just make sure you run the browned butter through a strainer (a metal mesh one, so it doesn’t melt!) and let it cool slightly before you add it to your recipe.

frozen-wild-blueberries

So, I was thinking about muffins, as I often do. Yes, really! I love them like family. They make a nice breakfast or a delicious snack. It’s cake that’s contained in it’s own little hand held package. Want fruit? Go for it! Nuts? Chocolate? Whatever you feel like!

While I was thinking about muffins, I inadvertently drifted over to breakfast--->pancakes--->blueberry pancakes--->maple syrup--->muffins! The light went on over my head and hit me like a dozen muffins. Or in this case, ten.

Blueberry muffins. Nearly everyone loves them. But putting a spin on them is the fun part! To mimic blueberry pancakes, I could add maple syrup. And browned butter to get the flavor you get from frying your pancakes up in melted butter.

Oh, yes. Now we’re talking! These are right up there in my top 5 favorite muffins now. I’ll definitely make them more, and in fact, they’re now my official blueberry muffin recipe!

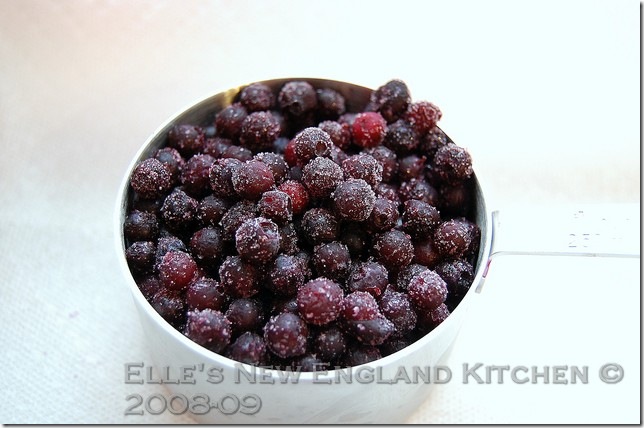
I used frozen Wild Maine Blueberries in these. You know, the little tiny ones? But you can use any kind you like. And even though I think purple muffins are extremely cool, I did rinse them before using. I wanted to see if the browned butter gave the batter some color, and it did. After baking, they were a nice caramel color.

frozen-wild-blueberries-2

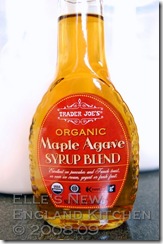
Maple Syrup. Please, if you love me, use real maple syrup in these. Not the doctored up corn agave-maple-syrupsyrup with artificial maple flavoring and coloring. In this case, I used a maple agave blend from Trader Joe’s. It’s real maple syrup blended with agave. It’s one of my new best friends! If you can’t get your hands on that, maple syrup is perfect.

agave-maple-syrup-drop

I adapted this recipe from one found in 100 Muffins and Scones, by Felicity Barnum-Bobb. This book is packed with mouthwatering recipes to feed my muffin addiction!

Browned Butter Blueberry Maple Muffins
adapted from
100 Magnificent Muffins & Scones, by Felicity Barnum-Bobb

To print this recipe, click here.

1 cup all purpose flour
1/2 cup white whole wheat flour
2 tsp baking powder
1/2 cup brown sugar
1 cup blueberries (if frozen, rinsed and set aside to dry a bit)
1/2 cup butter
1/2 cup maple syrup
2 eggs
1/2 tsp salt
1/4 cup maple syrup, for brushing over tops

browned-butter-blueberry-muffins

Heat oven to 375, and lightly grease your muffin pan.
Melt the butter in a small pan, letting it go until it starts to brown and smell nutty. Don't let it burn, but stop
when it gets deep brown. There will be dark sediment in the pan, so pour the butter through a wire mesh strainer
and set it aside to cool a bit. Don't worry if a bit of the sediment makes it through the strainer.
In a medium bowl, whisk together the flours, baking powder and sugar.
In a smaller bowl, toss the berries with 1/4 cup of the flour mixture.
In a large measuring cup or smaller bowl, whisk the melted butter, maple syrup eggs and salt.
Pour the wet stuff into the dry stuff, mix just until blended--then fold in berries.
Fill the muffin cups evenly (I got 10 muffins) and bake for 18-20 minutes.
Do the toothpick test--it should come out clean.
Let the muffins cool a few minutes in the pan, then run a knife around the edges, and turn them out on to a
cooling rack.
Place the cooling rack over a parchment lined pan, and brush the tops with the maple syrup.

browned-butter-blueberry-muffins-3

A question to you, my readers--what are your favorite kinds of muffins?

Stumble Upon Toolbar

Tuesday, May 12, 2009

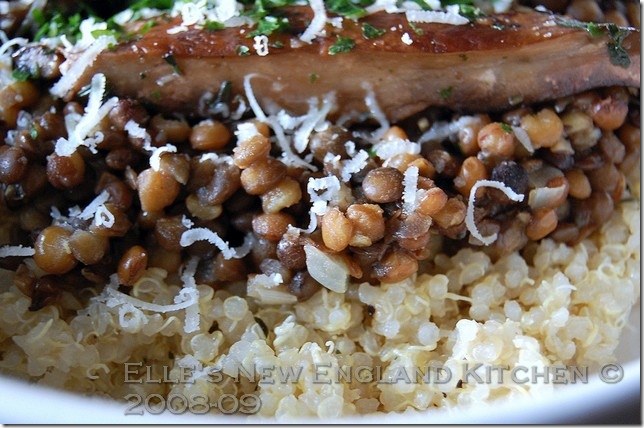
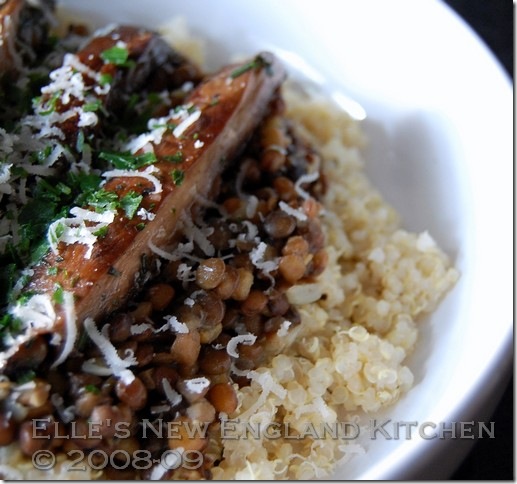
Quinoa Polenta with SautƩed Lentils and Portobellos

portobello-lentils-quinoa

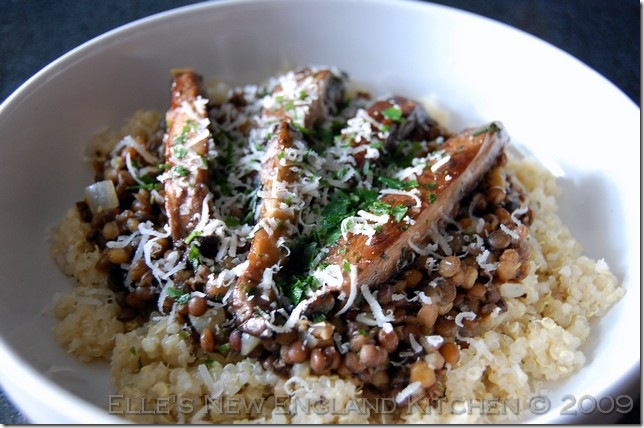
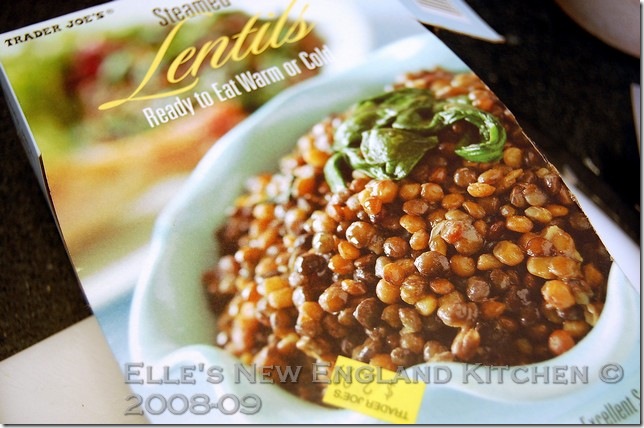
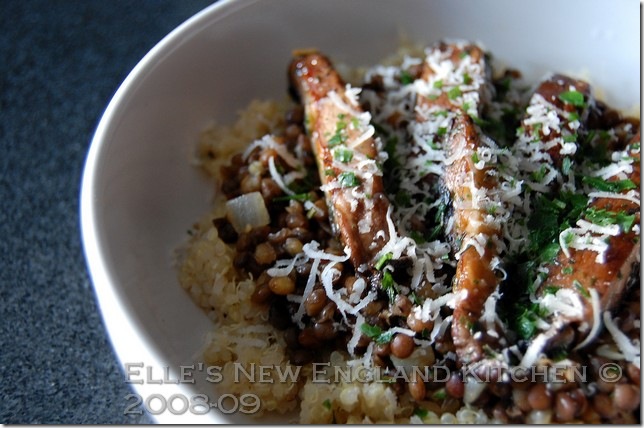
This dinner was put together one night when looking for a way to use up a package of steamed lentils from Trader Joe’s, a few Portobello mushroom caps, and some quinoa. Yes, I said steamed lentils! It’s a pack of 2 1/2 cups of lentils, vacuum sealed and ready to go. Now, there’s no reason at all why you couldn’t make your own lentils, but I think it would be better if you made them ahead and let them sit in the fridge for a day. Just like you do for fried rice. It lets them separate and firm up, and hold up better to sautĆ©ing—so they don’t turn to mush.

lentils

The quinoa part of this is done polenta-style, with some fresh grated parmesan, and is from Whole Grains for Busy People, by Lorna Sass. Couldn’t be easier! I’ve made this quite a few times already, even adding an extra bit of half and half at the end for a little more creaminess. Delicious!

Lorna’s book is loaded with great recipes—I have a ton marked to try. And it’s not a vegetarian book, by any means. There’s plenty of meaty recipes in there, but whole grains are included. And they’re all quick, weeknight meals, with grains that cook quickly. But don’t feel the need to limit them to just weeknights!

So get your quinoa polenta going in one pot, and start the lentils in another pan. If you like, you can do the mushrooms in a third pan, but I just transfer the lentils to a bowl when they’re done, then do the portobellos in the same pan. They’re very quick to cook up, so your other stuff isn’t going to get cold.

quinoa-lentils-portobellos-2

Don’t look at the three elements and think it’s too complicated, please. Each one is extremely quick and easy, I promise!

Quinoa-Style Polenta
From Whole Grains for Busy People, and slightly changed

1 cup quinoa
2 cups chicken broth (or use vegetable broth if you prefer)
1/2 cup grated fresh parmesan
1 tbsp butter
1 tbsp of your favorite fresh herbs, minced (or about 1 tsp dried)
salt and fresh cracked black pepper

In a saucepan, bring broth and quinoa to a boil.
Reduce heat to medium, cover and cook about 12-15 minutes, until most of the liquid is absorbed.
Stir in the remaining ingredients and set aside.

SautƩed Lentils

2-3 garlic cloves, minced
1/2 cup onion, chopped
2 1/2 cups cooked lentils
1 cup chicken broth (or vegetable if you prefer)
2 tbsp of your favorite fresh herbs, minced (or about 2 tsp dried)
fresh cracked black pepper

In a skillet over medium low heat, heat some olive oil, then add the garlic and saute for a few minutes, being
careful not to burn it.
Increase the heat to medium high, and add the onions--cook for a few minutes.
Add the lentils and broth, and simmer for about 5 minutes or so, stirring occasionally.
You want to cook off most of the liquid.
Add the herbs and pepper.
Set aside, or remove from pan--then wipe it clean and slowly heat a little olive oil to get ready for the mushrooms...

SautƩed Portobellos

2 cloves garlic, minced
3-4 large Portobello mushroom caps, stems removed and sliced, gills removed, and rinsed
your favorite herbs
fresh cracked black pepper and a little salt

Slice the mushrooms into pieces about 3/4 inch thick. Use the sliced stems, too, if you like!
Heat a bit of oil in a pan over medium low heat, then add the garlic.
Saute, being careful not to burn it.
Add the mushrooms and cook for about 2 minutes on each side.
Add herbs, salt and pepper.

Layer the quinoa, lentils, then mushrooms in your bowl, and top with extra grated parmesan.quinoa-lentils-portobellos-4

Serves 3 people

My meat-eating husband absolutely loves this one! And see how it serves three people? That means the two of us for dinner, and he gets the leftovers for lunch the next day. That’s how much he loves this dish.

quinoa-lentils-portobellos-3

Stumble Upon Toolbar

Monday, May 4, 2009

Food Blog Code of Ethics

There’s been a lot of buzz around the food blogging world for the last few days. If you want to know why, you can click the link and read all about it.

Food Blog Code of Ethics

While the basic idea of this code is common sense honesty, and I’m sure—written with good intentions--there are a few things about it that rub me the wrong way. I’ll touch on those first, then give you some links to other blogs who have posted about it, as well. I urge you to also read through the comments—they’re well thought out and may bring up some points you haven’t thought of.

1) This Code of Ethics was written by two trained journalists that also blog about food. So naturally, they lean towards journalistic ethics. And that’s fine! If you’re a journalist. Which I am not. I write this blog for fun. I look at it as friends having a chat about food.

2) The authors of the code say they had heated discussions with other food bloggers before putting it in writing. What food bloggers? I wasn’t one of them. I don’t think I know any one else that was asked to weigh in on it. I think that before one word of the code was released, it should have been put out there for all food bloggers to offer up opinions on. Granted, there would have been a lot of opinions to wade through, but I think if you’re going to set up “guidelines” that you’d like to apply to all food bloggers, then you ought to give them the option to know about it and be a part of it before you release it to the world. That’s common sense.

3) Honesty. It’s a very good thing! I’m an honest person with integrity. I don’t think that if I put a little badge saying “I Follow The Code” in my sidebar, you’ll all rest easier at night. Will you? I give my readers way more credit than that! You guys can discern between bullshit and the truth. It seems silly to me to have to tell you that I’m an honest person. You’ll either think someone is or not. But more importantly, you’ll form that opinion on your own. I actually read a comment by someone who was all aboard for the code, and said it was a way to *set themselves apart as having standards* they write by.

Well, excuse me (!), but I have standards already, and don’t need a code to proclaim it! Being ethical, honest, and civil are qualities you either have, or you don’t. And no code is going to help you if you don’t already possess those attributes.

4) While we’re on the subject of honesty…I really don’t expect that the thieves out there that steal blog content and photos will suddenly say “Oh, there’s a CODE? Well, that changes everything! I’ll stop stealing your content right away and never do it again!” Please. They’re going to do it anyway, because they’re unethical, and no badge or document will stop them. They have to want to do it.

5) The authors of the code think that restaurant reviews by food bloggers should be fair. I can’t argue with that at all. But they suggest visiting an establishment at least twice before reviewing. Which would be fine if I were a journalist with an expense account. But I’m a stay at home mom, and our budget for such things come out of my husband’s paycheck. I suggest that restaurants learn consistency and put out quality food every time a plate leaves the kitchen, or own up to it—and not get pissed at the food blogger that happened to get a bad plate of food.

6) I fund this blog. Which means I’m “Supreme Ruler and Dictator” when it comes to what I publish on it. If I want to be crude (which I’m not, for the most part) I will. If I don’t want to be civil, I won’t. Please refer to my title in line one, section six if you’ve got an issue with that.

7) From the code:

“As the blogging world expands exponentially, more and more people in the culinary world believe that food bloggers—as a groupare unfair, highly critical, untrained and power hungry individuals empowered by anonymity.”

I’m betting that the ones who think food bloggers are unfair and critical are the very ones being criticized by food bloggers. They call us hacks. I have a simple solution for them. Put out better food, better books, and better products. And put on your grown up panties and realize that not everyone will kiss your ass and tell you you’re awesome! If you’re putting yourself out there publicly, be ready for criticism. It’s part of being in the public eye.

8) The badge. For the time being, they’ve decided to hold off on releasing it, and thank GOD for that. They say: “We’re conflicted about the negative message the badge might convey.”

Negative message is right! Can you imagine new readers coming to a great, honest blog—not seeing the badge, and thinking “Oh, this must be written by an unethical, dishonest hack. I must go elsewhere.”

This badge should never, ever become the defining “badge of honor.” Because there are millions of honest, ethical and civil food bloggers out there, and they don’t need a badge to proclaim it. I’ll say it again. I think 99% of food blog readers are extremely smart people and can tell when someone is trying to bullshit them—and the 1% are trolls looking to piss people off. But for someone who just starts reading food blogs—well, I hope they never have to look for a badge of honesty to decide whether to read a blog or not.

_______________________________________________________________________________

I guess that was a little more than a few. But I feel very strongly about this. Now, the authors state plainly that these are guidelines, not rules. But really, if someone decides not to follow and jump on the bandwagon, does that make them unethical? Dishonest? Uncivil?

Hell, no! But it’s a slippery slope they’re on—trying to govern a very large group of people and hold them to standards that journalists follow. And with all due respect to these ladies, rather pretentious. I don’t know the numbers, but I’m betting most food bloggers aren’t trained journalists like the authors of the code. Will people embrace it, follow it, live by it? Or will the hype die down in a few months as we’ve all moved on to something else? I don’t know yet.

Here are a few links to check out. I hope you’ll go read them, and don’t forget the comments! There are many opinions, and things for you to think about. Whether you’re a food blog writer or a blog reader—you should know about this code, and decide if it’s important to you or not. As a reader, especially. Will you look for the badge of honesty? Or will you let the blogs speak for themselves, and use your intelligence to see when someone is lying to you?

Eating L.A.

Bitchin’ Avocado

SaltShaker

Sky full of Bacon

Guardian.co.uk

I’ll leave you with this: I’m an honest person. I’m ethical, and civil. And I care about my readers—I won’t lie to you. But I won’t subscribe to someone else’s idea of what a food blogger should be like. I’ll be me, without a shiny badge, and hope that you’ll still come back to read about what I have to say. And thanks to those that do!

Stumble Upon Toolbar

Monday, April 27, 2009

Raw Cream of Asparagus Soup

raw-asparagus-soup-5

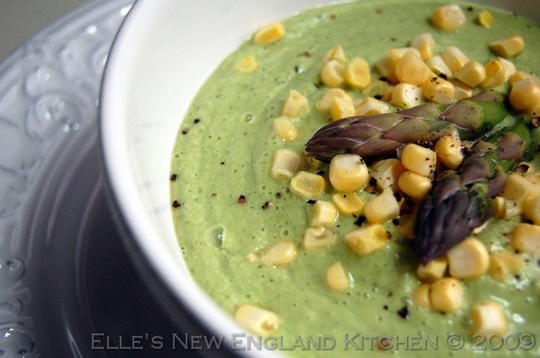
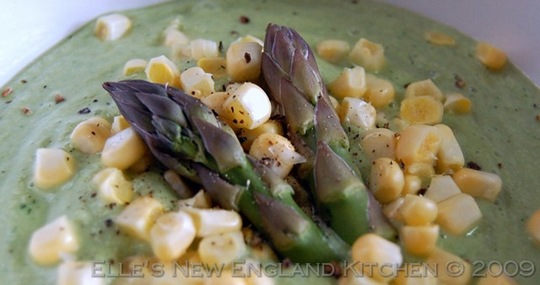
Yes, you read that right—raw!  This soup is completely uncooked, just made in a blender.  It’s not even heated up.  And don’t think I’m off my rocker, hehe.  Think cold soups and gazpacho! 

My husband and I have decided to incorporate healthier eating into our diets, in a couple of ways.  One, by adding one or two vegetarian meals per week, and two, by adding a couple of raw food recipes to our repertoire every week or so.  What are some benefits of eating raw foods?  Well, the obvious, of course—you’re  not cooking the nutrients, vitamins, and minerals out of the food.  Then there’s the fiber—that's an important benefit.  But so is feeling good about what you eat.

I’ll be the first person in line when someone’s grilling a steak, chicken, or a burger—I love meat.  But maybe I don’t want to eat it every single day.  Who says I have to?  No one, of course.  Maybe some of you are feeling the same way.  Especially in the summertime, when eating lighter and not heating up the kitchen sound like two really good things.  And eating lots of raw, locally grown and organic foods appeals to us right now.

raw-asparagus-soup-6

With these thoughts in mind, we went to Barnes and Noble last weekend, grabbed a bunch of raw (un)cookbooks off the shelf, grabbed a table in the cafe, and immersed ourselves in “uncooking.”   Some of the books were exactly what we expected.  Recipes were complicated, with three, four, or five separate components.  You “needed” a special blender, and a “must have” was a dehydrator.  Sure, the food looked amazing, but these recipes were no way to ease into a raw food lifestyle.  Not for us, anyway.

Two books stood out among all of the ones we looked at, though.  First, Ani's Raw Food Kitchen: Easy, Delectable Living Foods Recipes, by Ani Phyo, and Everyday Raw, by Matthew Kenney.

See them both here, on Amazon:


Both of these books make adding raw foods to your diet easy and definitely not daunting.  The recipes are droolworthy and beautiful.  The ingredients aren’t hard to track down.  There  may be a few new ingredients you haven’t seen or heard of yet, but that’s what google is for, right?  And so far, I’ve had no trouble tracking down the few things I didn’t have in my pantry. 

In Everyday Raw, Matthew says you don’t even need a dehydrator, which I don’t have.  You can use your oven on it’s lowest setting, with the door propped open.  What’s the dehydrator for?  Well, it’s for raw breads, crackers, crusts—in other words, they’re dried, not heated and baked. 
raw-asparagus-soup-2

I’m going to try my hand at making raw bread from Ani’s book this week, and will keep you posted.  It’s for the Sun Burgers on Black Sesame Sunflower Bread that she’s enjoying on the cover of her book.  They look and sound incredible!  My husband and I figured that since we’re just starting out and testing the waters, we’d compromise with crusts and breads for the most part.  In other words, if we want raw pizza, we’ll make the healthiest pizza crust we can find, bake it, and then add raw toppings.  Same thing for tart and pie crusts, breads, etc.  As we get better at this, maybe we’ll invest in that dehydrator and see what we can do.  A side note—Ani’s tart and pie crusts are not dehydrated—just held together with dates and pressed into the pan. 

So far, Ani’s book seems to be the best place to start.  She rarely uses a dehydrator—very few of her recipes call for one, and we already know we can use our oven.  She also has a website, where you can see some of her recipes.

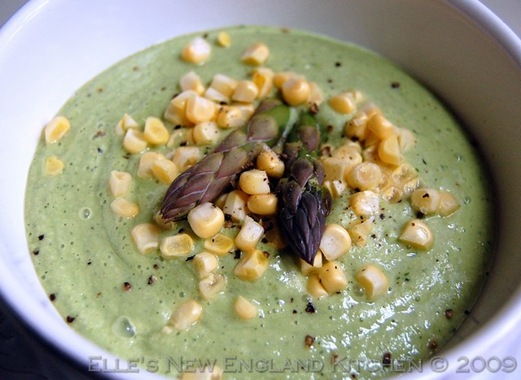
When we left the bookstore, we headed over to our local natural foods store.  It was fate.  They were serving samples of this raw soup.  Who can resist a free sample?  It was delicious—cool, creamy, fresh tasting, and had a little crunch from some fresh corn sprinkled over the top.  And guess what?  They had copies of the recipe, and everything to make it, right there in one place.  Of course we picked up everything to make it at home!
raw-asparagus-soup-3

This one’s very good for summer meals when you want a little bit of a starter.  Serve a small bowl or a pretty little cup of this to guests and I’m sure they’ll love it.  I don’t think I could sit and eat a whole bowl of this, though.  It’s amazingly creamy and rich for something that has no cream in it!  The creaminess comes from raw cashews blended right in, and an avocado.  There’s also coconut water in this.  Not coconut milk, but water.   That’s refreshing on it’s own!  And delicious, too.

Every single ingredient in this recipe, except for the raw cashews, can be found at my local grocery chain.  In fact, many of them were cheaper there than at the natural foods store.  It’s all trial and error.  Also—I think you could easily warm this soup up if you prefer! 

Raw Cream of Asparagus Soup

from A Market Natural Foods

Print this recipe here.

Makes 4 servings

1 bunch raw asparagus
1 ripe avocado
1 liter coconut water
1 cup raw cashews
1/4 cup fresh dill
juice of one lemon
1 tsp tamari
2 cloves garlic
1/2 tsp black pepper
1 ear fresh corn, with corn removed

Add all ingredients except corn to blender.
(If it's too much to fit all at once, do it in two batches and mix together.)
Blend until smooth or desired texture.
Top with fresh corn and serve.
raw-asparagus-soup-crop

Another benefit of raw cooking?  For the most part, it’s pretty quick.  This one was, anyway.  Keep an eye out for more recipes like this one, raw and uncooked.  But don’t worry, there’s still meat in the freezer, and bread in the oven, hehe.  Baby steps.

   raw-asparagus-soup-4

Stumble Upon Toolbar

Monday, April 20, 2009

Guacamole Ice Cream…sort of!

 avocado-ice-cream-10

Time for the monthly Royal Foodie Joust!  What’s the Joust, you ask?  It’s a monthly contest started by Jenn, The Leftover Queen.  Who also runs The Foodie BlogRoll.  And if you have a food blog and haven’t joined yet, what are you waiting for?  They have giveaways happening all the time, and all you need to do to enter is join the BlogRoll.  Plus, there are forums that are a great way to network, meet other bloggers, and find lots of great information.  So get on over there and check it all out!

Last month’s Joust was won by Peter and Christey at http://fotocuisine.com/, and they won with their entry for Almond Crusted Asparagus Rolls with Lemongrass Hollandaise.  How amazing does that look?   Well, everything they have posted does, right? 

avocado-ice-cream-7


The winner of each Joust gets to choose the three ingredients for the next Joust.  And this time, instead of choosing specific ingredients, Peter and Christey chose Red, White, and Green.  I loved this idea, because it leaves the Joust wide open to interpretation.  Feeling sweet, savory, traditional or daring?  Doesn’t matter—as long as you use some red, white and green.

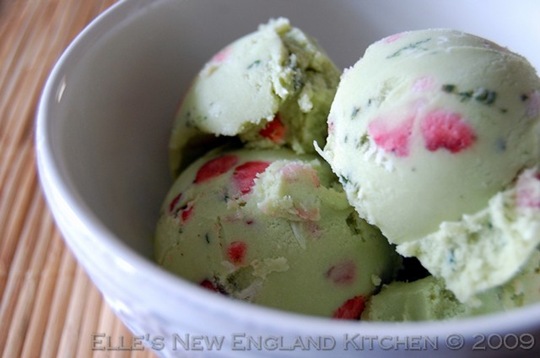
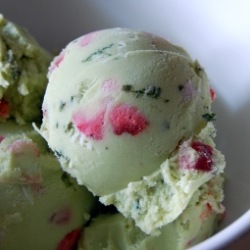
This past Saturday, I was having a short chat with Michele, at Life, Lightly Salted.  She’s a real sweetheart and has an outstanding blog, so please go and say hello to her.  We were talking about ice cream, and she was saying she was going to try making some avocado ice cream.  I swear, I almost saw the light bulb go off over my head.   I love guacamole, and what if I could make avocado ice cream, but make it look like the dip I love so much? 

avocado-ice-cream-3

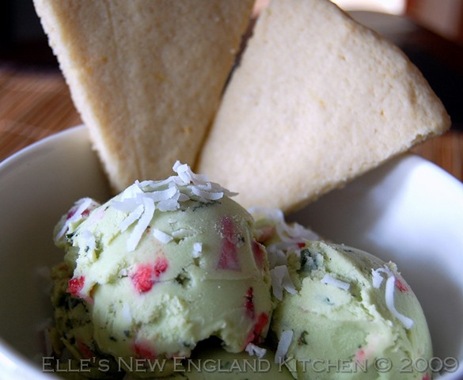
It all fell into place.  Since I’d always wanted to try avocado ice cream, I knew this would be fun—plus my ice cream maker was growing far too lazy.  I decided to use diced strawberries instead of tomatoes, shredded coconut in place of diced white onion, and mint would stand in for cilantro.

I used a basic recipe for the ice cream from Alton Brown.  You just can’t go wrong with his recipes.  I didn’t let the mixture chill for 4-6 hours, though.  More like 30-40 minutes, and I had no problems.  Damn my lack of patience!  And toward the end of the cycle, I tossed in a few small handfuls of coconut, and about 6 large diced strawberries.  I almost forgot the mint until my husband reminded me.  Whew!  I’d have hated to have forgotten that.  I just folded that in myself and them tossed it all in the freezer to set better.
shortbread-9

I should have taken a photo before scooping some out, though, because when it was in the container, it looked just like guacamole!  My daughter came in and said, “gross, mom, that ice cream looks like guacamole!”  Good!  that’s what I was going for!  ;)

avocado-ice-cream-crop-2

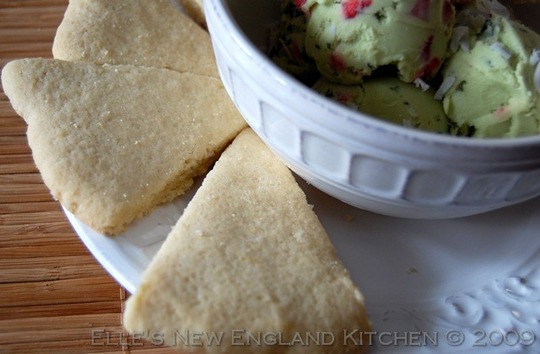
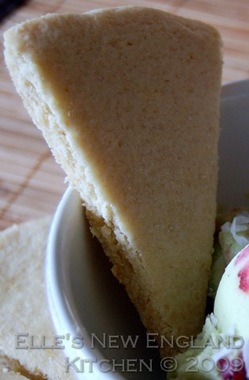
My “tortilla chips” would be played by shortbread cookies.  This recipe is from my grandmother, and we made it almost every year for Christmas.  The cookies are so pretty with red and green sugar on them.  We usually make them into individual cookies, but since I was trying to get the tortilla chip thing going, I split the dough into two portions, and patted it out into two circles on a parchment lined sheet.  Lightly score the dough into wedges, then bake.  After baking, you can separate the wedges.  (They take a little longer to bake this way—about 10 extra minutes.  they should feel set on the top.)  I know, most shortbread recipes don’t use any eggs, but I adore this recipe.  They seem lighter, and not so heavy.

shortbread-4

Mom's Shortbread Cookies

To print this recipe, click here.


This is my mom's tried and true shortbread recipe. She got it from my grandmother. These are great any time of year, but especially nice for Christmas gifts. You can sprinkle them with green or red sugar before baking. The flavor of these cookies improves with age, so make them a few days before you plan to give them away.

2 cups    flour  
1 cup    butter, softened  
1/2 tsp    baking powder  
1/2 cup    sugar  
1    egg  
1    fresh lemon rind, of grated 


shortbread-8

 
Sift flour and baking powder together in a small bowl. 
Cream butter, add sugar slowly, mixing well. 
Mix in egg and lemon rind. 
Add flour/baking powder mixture, mix in well. 
Shape into balls about the size of a golf ball, place on pan, flatten slightly with the bottom of a glass. 
Bake at 300° for 15 to 20 minutes, just until a bit golden on the edges. 
These last well if kept in a tightly covered container, and actually taste even better after a day or two as the flavors develop.


Yield: 48-60 cookies
Preparation time: 15 minutes
Ready in: 30 minutes


And that’s it—that’s my entry for this month’s Royal foodie Joust.   Wish me luck!  And avocado ice cream?  Let’s just say it’ll be in regular rotation this summer.   Because, yum!avocado-ice-cream-9       


Stumble Upon Toolbar