My blog has moved!

You will be automatically redirected to the new address. If that does not occur, visit
http://www.ellesnewenglandkitchen.com
and please update your bookmarks.

Sunday, June 29, 2008

DB'ers June Challenge--Danish Braids


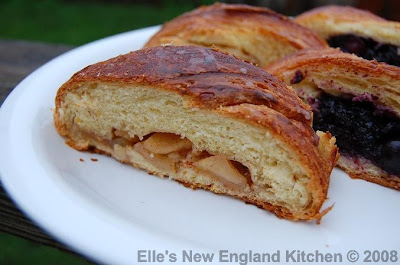
I so wish that I could bottle scents and sell them. If I could do that with this month's challenge, I'd sell a ton. We made Danish Braids this month, and the dough--not only was it a dream to work with, but it's scented with orange zest, vanilla bean, and cardamom. It just doesn't get any better than that, folks. The aroma while the braids were baking was heavenly! But that doesn't even compare to the taste. It was out of this world delicious! So good, in fact, that I had to send most of these to work with my husband. They were dangerous! Dangerously delicious, hehe! Fillings were up to us entirely, so I decided to go with half the apple filling recipe for one, and cooked down blueberries with a bit of sugar, layered over almond paste for the second braid. Both were fabulous, but the blueberry almond was my favorite, and I was sad to see it walk out the door to go to the office with my husband. But I seriously could have eaten all of these. OINK! They had to go.

This month's challenge was chosen and hosted by Kelly at Sass & Veracity, and Ben at What's Cooking.

A few facts:

• Danish dough is in the family of butter-laminated or layered doughs with puff pastry being the ultimate. Danish dough is sweet and is yeast-leavened, however, where as puff pastry is not.
• The process of making Danish dough is less complex than that of puff pastry, but equally as important to achieve best results, and a great starting place to begin to learn about laminated doughs in general.
• Danish dough is extremely versatile, and once made can be used for a variety of baked goods. The possibilities are endless.

There are a lot of steps involved, and it seems overwhelming, but it really isn't. The most important thing to remember, I think, is to let the dough rest for the 30 minute intervals. It needs three 30 minutes rests, and then the final rest of 5 (yes, 5!) hours. So plan to either start early in the day, or give the dough, and yourself, a rest overnight, and start again the next day. This recipe makes two braids. The time to divide the dough has varied in the posts I've read, but I split mine after its overnight rest in the fridge. Divide it, then roll each portion into a 10x15" rectangle. You'll cut parallel strips on each side, remove the extra dough in the corners (you'll see what I mean in the photos), add your filling down the center, fold in the 2 end flaps, then braid the strips. Make sure when you cut the strips that you leave a large enough base to hold the fillings--make sure your rectangles are 10x15 to start, and you should be all set.

Braiding was a bit stressful at the beginning, hoping I'd do it right, and have beautiful baked braids that held their shape--but it was a cinch to do! Make sure to cut your strips long enough so that they reach all the way over the dough on the other side, and give them a pinch to stay in place. Tuck your last braid under the previous one and give that a little pinch, too.

I've got lots of step by step photos, so here we go!

Some extra, but helpful info:
Terminology:
• Laminated dough – is layered dough created by sandwiching butter between layers of dough
• Detrempe – ball of dough
• Beurrage – butter block
• Turn – each “fold & roll” of the dough produces a single turn in a 3-step process where the dough is folded exactly like a business letter in 3 columns. Each single turn creates 3 layers with this method.

For Your Consideration:
• This recipe calls for a standing mixer with fitted attachments, but it can easily be made without one. Ben says, “Do not fear if you don’t own a standing mixer. I have been making puff pastry by hand for many years and the technique for Danish pastry is very similar and not too difficult.” Look for the alternate directions in the recipe as appropriate.
Yard recommends the following:
• Use well-chilled ingredients. This includes flour if your kitchen temperature is above 70 degrees F (~ 21 degrees C).
• It is recommended that long, continuous strokes be used to roll the dough rather than short, jerky strokes to make sure the butter block is evenly distributed.
• The 30-minute rest/cooling period for the dough between turns is crucial to re-chill the butter and allow the gluten in the dough to relax.
• Excess flour accumulated on the surface of the dough after turns should be brushed off as pockets of flour can interfere with the rise.
• Yard calls for a “controlled 90 degree F environment” for proofing the constructed braid. Please refer to this chart to assist you in this stage of the challenge:

Proofing Temperature For Fresh Dough
(room temp) For Refrigerated Dough
Degrees F Degrees C
70 ~ 21 1-1/2 to 2 hrs. 2-1/2 to 3 hrs.
75 ~ 24 1-1/4 to 1-1/2 hrs. 2 to 2-1/2 hrs.
80 ~ 27 1 to 1-1/4 hrs. 1-1/2 to 2 hrs.
85 ~ 29 45 min. to 1 hr. 1 to 1-1/2 hrs.
90 ~ 32 45 min. 1 hr.

• When making cuts in the dough for the braid, make sure they are not too long and provide a solid base for the filling.
• Ben on Cardamom: It can be very expensive as some stores, but if you have an Indian store nearby, it can be considerably less expensive than at your local grocery store. If you can’t find it or it is still cost prohibitive, then you can use a substitute. Many people would say that there is no substitute for the unique flavor of cardamom and it is better to leave it out. But I’ve found out that combining cinnamon, ginger, and nutmeg in equal portions words pretty well. Of course, it doesn’t come close to the cardamom taste, but it worked just fine for one of my test batches.
• Kelly’s Two Cents: I had some green cardamom pods on hand and used 16, cracking and emptying the contents into a grinder to get the quantity called for in the recipe for the dough. The quantity barely put a dent in my 1 oz. bottle. If you don’t have an Indian store near by, you may consider on-line spice retailers like http://www.thespicehouse.com/spices/car … -and-black or http://spicebarn.com/cardamom_seed.
Yes, there’s postage involved, but you’ll have cardamom for many other
recipes for a fraction of the cost, even with postage.


Danish Braid

Sherry Yard, The Secrets of Baking


DANISH DOUGH

Makes 2-1/2 pounds dough

Ingredients
For the dough (Detrempe)
1 ounce fresh yeast or 1 tablespoon active dry yeast
1/2 cup whole milk
1/3 cup sugar
Zest of 1 orange, finely grated
3/4 teaspoon ground cardamom
1-1/2 teaspoons vanilla extract
1/2 vanilla bean, split and scraped
2 large eggs, chilled
1/4 cup fresh orange juice
3-1/4 cups all-purpose flour
1 teaspoon salt

For the butter block (Beurrage)
1/2 pound (2 sticks) cold unsalted butter
1/4 cup all-purpose flour

DOUGH
Combine yeast and milk in the bowl of a mixer fitted with the paddle attachment and mix on low speed. Slowly add sugar, orange zest, cardamom, vanilla extract, vanilla seeds, eggs, and orange juice. Mix well. Change to the dough hook and add the salt with the flour, 1 cup at a time, increasing speed to medium as the flour is incorporated. Knead the dough for about 5 minutes, or until smooth. You may need to add a little more flour if it is sticky. Transfer dough to a lightly floured baking sheet and cover with plastic wrap. Refrigerate for 30 minutes.

Without a standing mixer: Combine yeast and milk in a bowl with a hand mixer on low speed or a whisk. Add sugar, orange zest, cardamom, vanilla extract, vanilla seeds, eggs, and orange juice and mix well. Sift flour and salt on your working surface and make a fountain. Make sure that the “walls” of your fountain are thick and even. Pour the liquid in the middle of the fountain. With your fingertips, mix the liquid and the flour starting from the middle of the fountain, slowly working towards the edges. When the ingredients have been incorporated start kneading the dough with the heel of your hands until it becomes smooth and easy to work with, around 5 to 7 minutes. You might need to add more flour if the dough is sticky.

BUTTER BLOCK
1. Combine butter and flour in the bowl of a mixer fitted with a paddle attachment and beat on medium speed for 1 minute. Scrape down the sides of the bowl and the paddle and then beat for 1 minute more, or until smooth and lump free. Set aside at room temperature.
2. After the detrempe has chilled 30 minutes, turn it out onto a lightly floured surface. Roll the dough into a rectangle approximately 18 x 13 inches and ¼ inch thick. The dough may be sticky, so keep dusting it lightly with flour. Spread the butter evenly over the center and right thirds of the dough. Fold the left edge of the detrempe to the right, covering half of the butter. Fold the right third of the rectangle over the center third. The first turn has now been completed. Mark the dough by poking it with your finger to keep track of your turns, or use a sticky and keep a tally. Place the dough on a baking sheet, wrap it in plastic wrap, and refrigerate for 30 minutes.
3. Place the dough lengthwise on a floured work surface. The open ends should be to your right and left. Roll the dough into another approximately 13 x 18 inch, ¼-inch-thick rectangle. Again, fold the left third of the rectangle over the center third and the right third over the center third. No additional butter will be added as it is already in the dough. The second turn has now been completed. Refrigerate the dough for 30 minutes.
4. Roll out, turn, and refrigerate the dough two more times, for a total of four single turns. Make sure you are keeping track of your turns. Refrigerate the dough after the final turn for at least 5 hours or overnight. The Danish dough is now ready to be used. If you will not be using the dough within 24 hours, freeze it. To do this, roll the dough out to about 1 inch in thickness, wrap tightly in plastic wrap, and freeze. Defrost the dough slowly in the refrigerator for easiest handling. Danish dough will keep in the freezer for up to 1 month.

APPLE FILLING
Makes enough for two braids

Ingredients
4 Fuji or other apples, peeled, cored, and cut into ¼-inch pieces
1/2 cup sugar
1 tsp. ground cinnamon
1/2 vanilla bean, split and scraped
1/4 cup fresh lemon juice
4 tablespoons unsalted butter

Toss all ingredients except butter in a large bowl. Melt the butter in a sauté pan over medium heat until slightly nutty in color, about 6 - 8 minutes. Then add the apple mixture and sauté until apples are softened and caramelized, 10 to 15 minutes. If you’ve chosen Fujis, the apples will be caramelized, but have still retained their shape. Pour the cooked apples onto a baking sheet to cool completely before forming the braid. (If making ahead, cool to room temperature, seal, and refrigerate.) They will cool faster when spread in a thin layer over the surface of the sheet. After they have cooled, the filling can be stored in the refrigerator for up to 3 days. Left over filling can be used as an ice cream topping, for muffins, cheesecake, or other pastries.

DANISH BRAID
Makes enough for 2 large braids

Ingredients
1 recipe Danish Dough (see below)
2 cups apple filling, jam, or preserves (see below)

For the egg wash: 1 large egg, plus 1 large egg yolk

1. Line a baking sheet with a silicone mat or parchment paper. On a lightly floured surface, roll the Danish Dough into a 15 x 20-inch rectangle, ¼ inch thick. If the dough seems elastic and shrinks back when rolled, let it rest for a few minutes, then roll again. Place the dough on the baking sheet.
2. Along one long side of the pastry make parallel, 5-inch-long cuts with a knife or rolling pastry wheel, each about 1 inch apart. Repeat on the opposite side, making sure to line up the cuts with those you’ve already made.
3. Spoon the filling you’ve chosen to fill your braid down the center of the rectangle. Starting with the top and bottom “flaps”, fold the top flap down over the filling to cover. Next, fold the bottom “flap” up to cover filling. This helps keep the braid neat and helps to hold in the filling. Now begin folding the cut side strips of dough over the filling, alternating first left, then right, left, right, until finished. Trim any excess dough and tuck in the ends.

Egg Wash
Whisk together the whole egg and yolk in a bowl and with a pastry brush, lightly coat the braid.

Proofing and Baking
1. Spray cooking oil (Pam…) onto a piece of plastic wrap, and place over the braid. Proof at room temperature or, if possible, in a controlled 90 degree F environment for about 2 hours, or until doubled in volume and light to the touch.
2. Near the end of proofing, preheat oven to 400 degrees F. Position a rack in the center of the oven.
3. Bake for 10 minutes, then rotate the pan so that the side of the braid previously in the back of the oven is now in the front. Lower the oven temperature to 350 degrees F, and bake about 15-20 minutes more, or until golden brown. Cool and serve the braid either still warm from the oven or at room temperature. The cooled braid can be wrapped airtight and stored in the refrigerator for up to 2 days, or freeze for 1 month.


Photos!
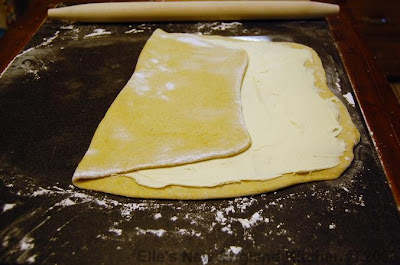
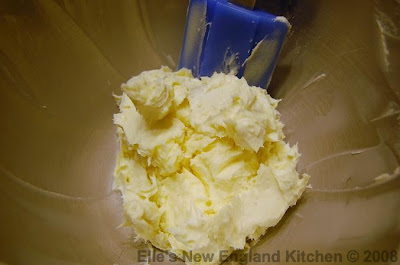
Butter Block

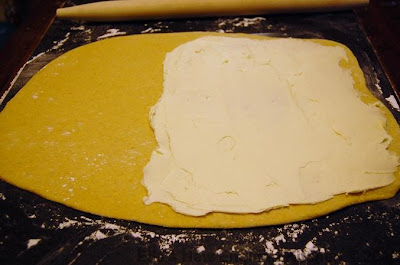
First roll out of the dough, and butter block spread over 2/3 of it.


Fold end with no butter halfway over buttered dough. You're folding in three, like a business letter.
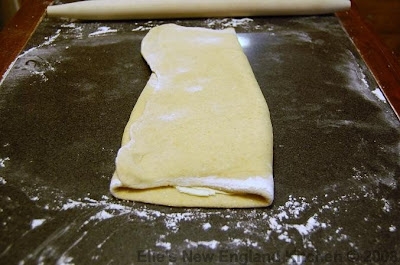
Here is your folded business letter, and your first completed turn of the dough!

****This is where you let the dough rest for 30 minutes. Take it out of the fridge, roll to a 13x18" rectangle, fold the open ends in, like a business letter, and let it rest for 30 minutes again, in the fridge. This is your second turn. Two more to go, and after the last turn, give it a rest for 5 hours or overnight.

After the 5 hour rest period, divide the dough in two. Refrigerate one while you start on the other. Roll to a 10x15" rectangle, and continue on.
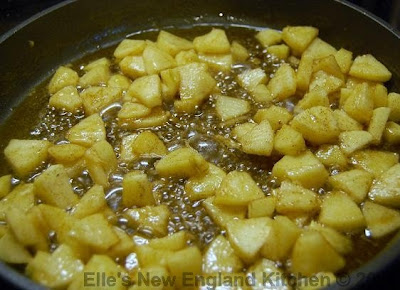
Apple filling cooking down. Blueberry filling was done the same way. Three cups blueberries, 1/2 cup sugar, cook down until syrupy and thickened. Add about 1/2 cups blueberries at the end for a few whole berries in the filling.
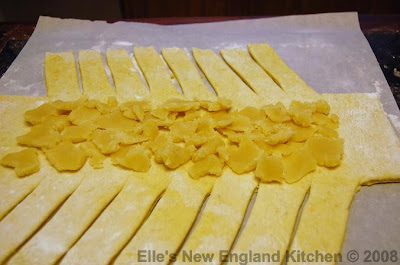

Almond paste waiting for blueberries.

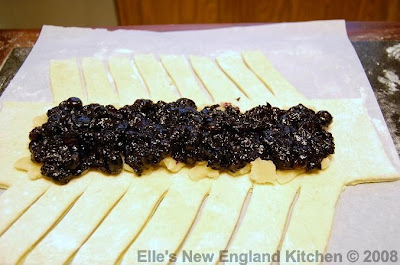
Blueberry filling over almond paste.

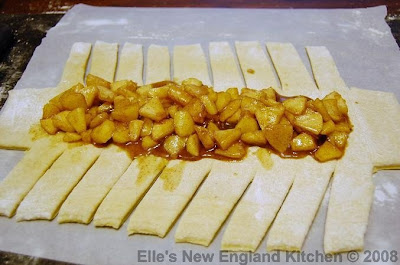
Apple filling.


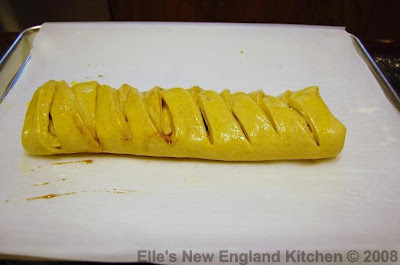
Finished braid.

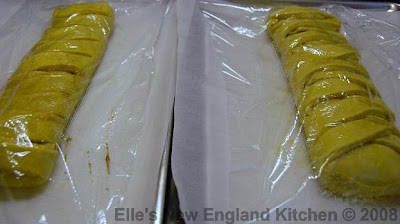
Finished braids, proofing. I preheated my oven to 175 F, then shut it off and put the braids in to proof. After about one hour, they were ready to go.


Finished braids.


Glazed with a mixture of powdered sugar, water, and vanilla bean seeds.



I encourage everyone to try this recipe! You'll be thrilled to complete something like this, and so happy when you take that first (second, third, fourth, fifth, etc....)bite! It's not as difficult as it may seem. Just follow the steps, and you'll be fine.


Thank you to Kelly and Ben for choosing this recipe! I never in a million years would have thought I could do this, but I did! Another huge accomplishment and another DB Challenge chalked up. Whew! hehehe!


A few helpful links:

http://www.montag.it/comida/archives/003949.html
http://www.youtube.com/watch?v=Yg-zXn_YpLI&feature=related
http://www.pbs.org/juliachild/meet/ojakangas.html#

Stumble Upon Toolbar

Friday, June 27, 2008

I originally promised you New England scenery, didn't I?


So today's in-between-food-posts post will be about a small part of New Hampshire's seacoast. I don't even know what this beach is called, or if it even has a name. It's a tiny little cove that my son started calling Clam Beach when he was three, and the name stuck.

It's a little harbor where small boats are docked, and some larger fishing boats head out of the area, as well.
It's divided into two sections--one for the boats and one that is just water. We like it because it's easy to see the kids at all times--it doesn't get busy, and the kids can play in the water and find little crabs and snails for their buckets.

Here are some photos from two summers ago, in 2006...

See the rocks in the first photo? Everything to the left of those is boats and open sea.


Everything to the right of these rocks is the little beach and cove...

That's a restaurant in the distance.


A boy dreaming of adventures on the sea, maybe?
(My youngest, when he was three.)


So there you go. A post about something other than food. We love living here in New England and wouldn't trade it for the world! Visiting other places is fun, but it's always good to come home.

:) Stay tuned for a delicious post...


Stumble Upon Toolbar

Wednesday, June 25, 2008

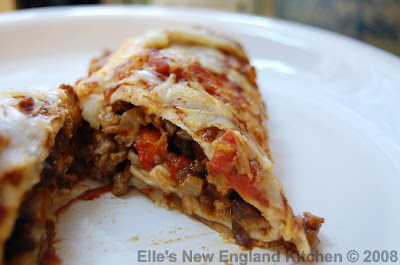
What is the trick to making enchiladas pose nicely for a photo?!?


Damn enchiladas. They taste incredibly good, but those irritating little filled tortillas like to get all ugly for the camera. At least that's how it is for me. This is the second enchilada recipe that I've made and photographed, and the first one is still sitting in my files because even though they're delicious, the photos are just not good. Maybe I should just do a few days of ugly photo posts and be done with it, hehe.

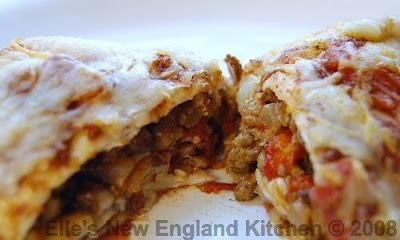
Anyway, these enchiladas are George's recipe, at Culinary Travels of a Kitchen Goddess. (Check out her enchilada photos--they're much prettier!) I admit it, I'm a sucker for enchiladas, and these looked really interesting! I always make chicken ones, but these were ground beef and ground pork, with beans, too. Which is what my husband has been asking for--guess he wanted a break from chicken. They certainly don't disappoint! Now, she says right from the start that the spices are toned way down in these, because they were made for her Mum. No biggie, I just upped the spices, adding more cumin, chili powder, and as a quick afterthought, some of the homemade taco seasoning I keep on hand. Same with the sauce, just up the spices. For you recipe tweakers out there, this is a perfect one for you! You get an awesome base recipe, but you can personalize it to suit your spice/heat levels.

I only had one issue, and it wasn't a bad one. This makes 8 large enchiladas, like burrito size! So I used 2 11 x 7 pans with 4 enchiladas in each. This meant I didn't have enough sauce, and no more ingredients to make more of George's sauce. So I pulled out my trusty enchilada sauce recipe which is made from pantry staples and only takes about 15 minutes to make, and added it to George's sauce. The combination was perfection!!

And oh my goodness, are they delicious! Oh! Instead of buying ground beef and pork, I bought a meatloaf mix of ground pork, beef and veal. I also added a bit of a shredded cheese blend to the called for mozzarella topping--whatever kind you have on hand would be fine. Also, subbed black beans for the kidney beans.

These are satisfying and filling. And so good, that my husband took one for lunch, and wants the rest for dinner tonight. So there's a testimony for you!


And in case you're curious, here is my trusty enchilada sauce recipe, because the two sauces mixed together were just perfect--hers has pieces of tomato in it, and mine doesn't, but they added a nice texture to my sauce. Hers also has lime juice, which added an overall brighter flavor to the sauce.

1 medium onion, chopped
2 cloves garlic, chopped
2 Tbs vegetable oil
1 1/2 cups chicken broth
1-2 Tbs chili powder
1 tsp dried oregano leaves
1 1/2 tsp cocoa
1/8 tsp cinnamon
1 tsp ground cumin
1 tsp salt
1 (8 oz) can tomato sauce


Cook and stir onion and garlic in oil in a 2-quart saucepan until onion is tender.
Stir in broth, spices, salt and tomato sauce.
Heat to boiling; reduce heat, simmer uncovered 10 minutes.


Thanks, George, for another winning recipe! :)

Stumble Upon Toolbar

Tuesday, June 24, 2008

Blondies for a Kitchen Goddess


These Blondies...oh my gosh. They're sinful! Certainly fit for a Kitchen Goddess. This recipe is from George, at Culinary Travels of a kitchen Goddess. If you haven't checked out her site, you should!

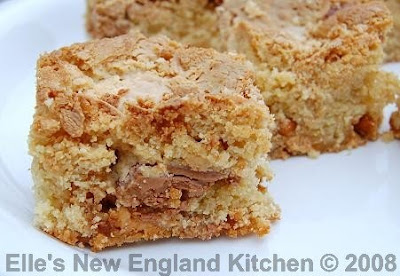
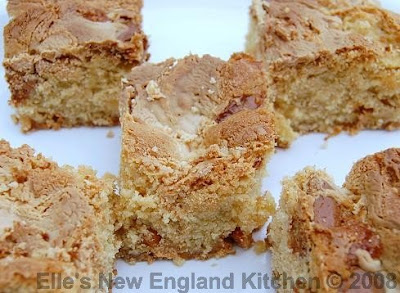
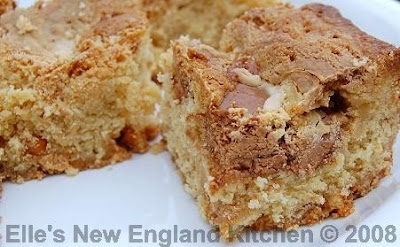
These are cakey, but moist and dense at the same time. How could they not be, with all the good stuff in there? There's white chocolate, butterscotch chips, AND a chocolate caramel bar, too! Next time I make these, I'd like to try to get some darker chocolate in there instead of one of those three, to counter the sweetness a bit. But all in all, they're a great treat!


The kids love them, except for one, who has a thing about white chocolate. Silly. :) I think I over baked mine a teeny bit, because they weren't setting up in the center. The middle of the blondies was still really wet, so I gave them a few more minutes, and let them go a few extra besides, after getting sidetracked with this month's Daring Bakers project. But guess what? They're still moist! They really are delicious, so if you're looking for a fun treat for the kids, give this a try!

You can find the recipe at the link above, along with a bunch more delicious looking things.

Also, I've been tagged by Bunny at Bunny's Warm Oven. I almost forgot, because I've been so busy. Still am, in fact, with the kids out of school for the summer. So instead of procrastinating and forgetting, I'm going to link here to my last Meme.

My Meme!

Thanks for the tag, Bunny!

Stumble Upon Toolbar

Saturday, June 21, 2008

That Cookbook Thing II...Sauce au Cari (Light Curry Sauce)


What is That Cookbook Thing II? TCT II is a group started by Mike of Mel's Diner. I was invited to join a few weeks ago and was thrilled. What are we doing? We are trying out recipes from Mastering the Art of French Cooking, by Julia Child, Louisette Bertholle, and Simone Beck. How could I say no to that? It was an excuse to buy another cookbook, and something I probably wouldn't have done one my own.

Other members of the group, along with Mike mentioned above, are:

Sara
Mary
Ruth
Deborah
Mary
Shaun
Kittie

The first recipe they did was
Soupe Gratinee des Trois Gourmandes (Onion Soup Gratineed deLuxe). Bummer that I missed that one, because it got a great reception. This time around, The Benevolent Tyrant (that's his self-appointed title, hehe), Mike, told us we'd be trying out Sauce au Cari, or Light Curry Sauce. It's definitely an easy one to start with. I'll bet most of you have everything on hand to make it!

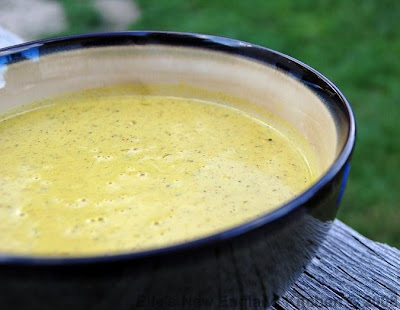
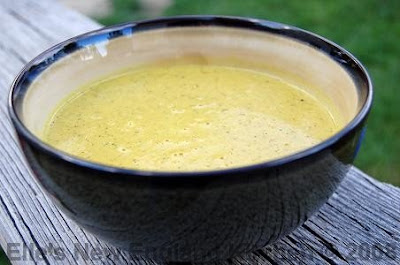
Will you like it? That is the question. It smells amazing. It looks gorgeous. The taste? Not for me, unfortunately. It's...sort of bland. I'm sure it could be great, if Julia was in my kitchen, making it for me. At least I know it's not just me. I wasn't the only one in TCT II that didn't care for it. But here it is, just the same...

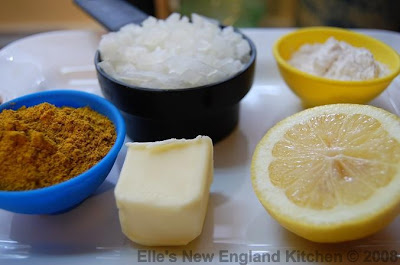
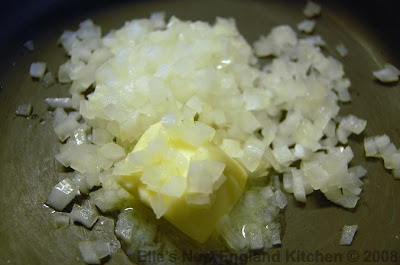
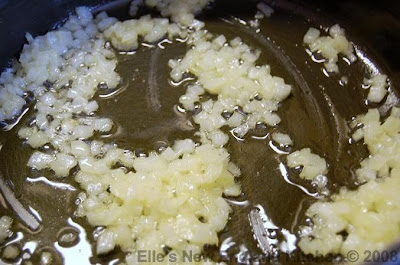
Easy ingredients: onion, butter, curry powder, flour, whipping cream, salt and pepper, lemon juice, a bit more butter and parsley to finish. Simple procedure: saute onion and butter over low heat, add curry powder, then flour, add stock, simmer and add cream, season to taste with s & p and lemon juice.


This just in! After the sauce sat for a while, we tried our chicken (skinless, boneless thighs, baked simply with salt, pepper, garlic and lemon juice) dipped in the sauce. It really was much better after it had a chance to sit for about 30 minutes. I'm glad my husband decided to try it after he got up from his nap! Would I make it again? Not sure, but at least it wasn't a total waste of time. We shredded our chicken, and had it with brown rice, and the curry sauce.

Next up is Rapee Morvandelle - a gratin of shredded potatoes with ham, eggs & onions. Looking forward to it, very much!

Thanks, Mike, for the invite to the group, and to all the group members for the nice welcome! Be sure to check out the other member's blogs for their takes on it!


Stumble Upon Toolbar

Thursday, June 19, 2008

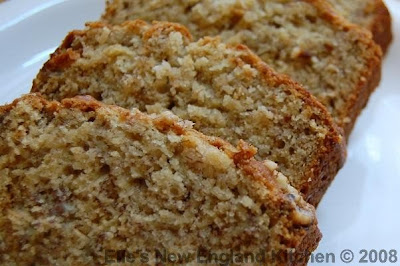
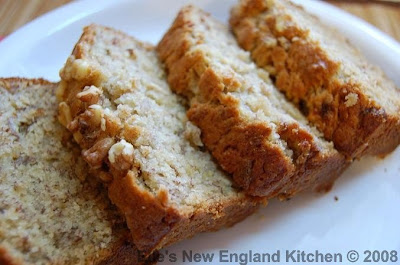
The Humble Banana Bread


It really is a humble little bread, isn't it? It isn't a grand dessert, given a starring role on restaurant menus. But it's delicious, just the same--for a snack, or yeah--for breakfast! It's the kind of thing you picture your grandmother or your mom making, and it brings you right back to their kitchens--or at least for me, it does. And I don't know about you, but when I get a craving for banana bread, I've got to have some.

The only thing standing in the way of banana bread is my kids, the little monkeys. They eat all the bananas! I've had to start hiding some from them, just so we can have banana bread or these muffins, which we all go crazy for.

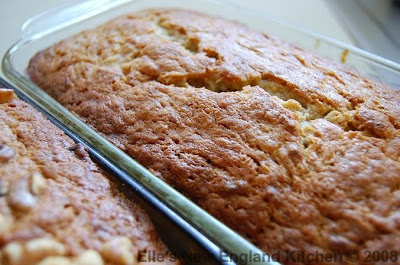
This recipe is from an old friend, and it's definitely our favorite. This is the one my husband asks for when he gets a craving for banana bread. And even better--it makes two loaves. I love getting more for my work, don't you? You can freeze one, if you like--just wrap it tightly in plastic wrap, then foil, and I throw it in a freezer bag for good measure. It's a moist bread, buttery and tender, and just right.

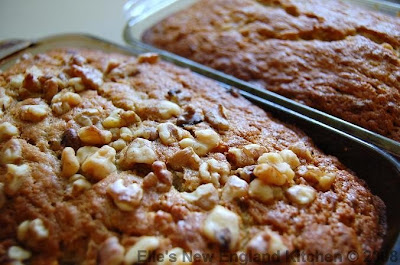
If you have buttermilk and want to use that instead of plain milk, it's delicious that way, too. The original recipe calls for three cups of sugar, but I cut it down to two and a half cups. And add nuts if you like! I'd add nuts, and a lot of them if the kids didn't find them so revolting. What is it with them?! I ended up adding some walnuts to the top of one loaf, anyway. One of my favorite ways to have a slice is to pop it in the toaster, and then put peanut butter on it. Because peanut butter makes so many things better. It's right up there with bacon, cheese and chocolate for their food enhancing capabilities.


Perfect Banana Bread

1 cup unsalted butter -- softened
2 1/2 cups granulated sugar
2 large eggs
2 tsp vanilla extract
1/2 cup milk or buttermilk
3 cups banana -- mashed
4 cups all-purpose flour
1 tsp baking powder
1 tsp baking soda
1 tsp salt


Preheat oven to 325 degrees.
Cream butter and sugar.
Add egg and and vanilla.
Then add milk and mashed banana.
In a separate bowl; sift and stir together the flour, baking powder, baking soda, and salt.
Mix the dry ingredients into the wet ingredients until just combined. Do not over mix.
Pour into a greased glass loaf pan. Bake for 1 hour 15 minutes, to 1 hour 25 minutes or until nicely browned and done when checked with a cake tester.


Yield: 2 loaves
Preparation time: 10 minutes


Print this recipe!

Stumble Upon Toolbar

Monday, June 16, 2008

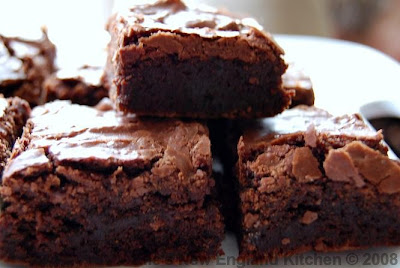
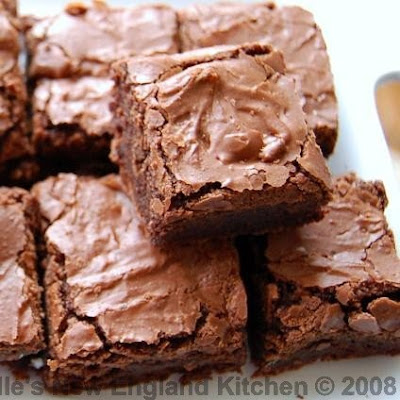
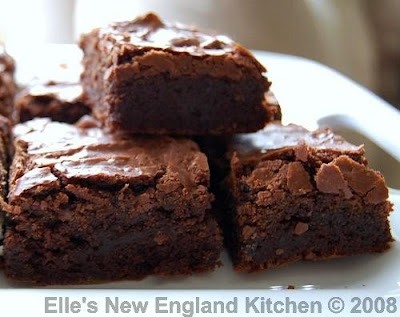
It's not easy photographing brownies on a rainy day.


I had to roam all over the house, plate of brownies in hand, being followed by two hopeful corgis and one hopeful five year old. All three wishing that I'd drop one or two. I didn't, but promised the kid he could have one after they had their picture taken. The dogs were out of luck.


Just look at that crackly, shiny crust!


I finally found a spot in the living room in front of our big window. Nice daylight flooding in there, but geez, it was still tough to get them to look right. I mean, I think they look ok, but it was tough to show how moist and fudgy these really are. And are they ever! I really think this is the last brownie recipe I'll ever need. Seriously! They are easy to make, have cocoa and a nice big dose of melted chocolate, and just give you that "Holy @$%*, these are awesome!" feeling. I dare you to try one and not say that. Just one of these can wash all your troubles away. Ok, it may take two, but that's not hard to take, is it?

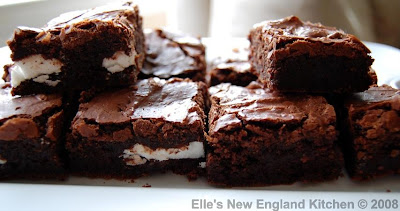
I had planned on making Peppermint Pattie Brownies, but remembered that I'd bookmarked another one to try. So glad I thought of them! I had the Peppermint Patties anyway, so I decided to make one pan with and one without.


These Double Chocolate Brownies can be found at Bake or Break, and they are a Martha Stewart recipe. They are perfect. Rich and chocolatey, but not too sweet, and extremely moist. I only did a couple things differently--I melted the chocolate (Ghirardelli semi sweet chips), butter and cocoa in a pan, and not over simmering water. Just do it on medium low and stir it often. You can get the other elements of the recipe ready to go while you keep an eye on it. I didn't notice that you're supposed to butter the pan and the parchment. I didn't do either, and had no trouble, thank goodness! I doubled the recipe and split it between two 8" square pans. I pressed nine Peppermint Patties (mini ones!) evenly into one pan, 3 rows of 3. Press them down about halfway, and using a spoon, gently cover them over with batter. They both baked for exactly 35 minutes and were perfect.

Cool in the pan for 15 minutes, lift the out and let them cool completely before cutting. If you can.


Go make some! I'll bet you have everything on hand, right now. :)


Was that enough brownie porn for one day? I hope so, because I'm all out!

Stumble Upon Toolbar

Sunday, June 15, 2008

Tastespotting is no more. Where will we go?

Poor Tastespotting. Poor us! I read Tastespotting every day and got TONS of ideas from it. I'm seriously going to miss it.

But there's hope! A friend from the Foodie Blogroll decided to use her site, which was already set up sort of like TS, to start accepting food bloggers photos. So far, so good, but we need to get the word out!

It's a piece of cake to submit, just like on TS. You have to join first, but then you can submit your links and photos.

Go to Recipes2Share, click on Gallery in the top menu bar, and you can view some brand new entries! Click on the photo for a bigger view, or click on the description to be transported to the blog entry.

So get your photos ready and submit them to Recipes2Share, and let's spread the word!

Stumble Upon Toolbar

Saturday, June 14, 2008

Please stick with me! (updated, all fixed!)

For whatever reason, I'm having major blog issues for readers using Internet Explorer. I'm working very hard to figure out what it is, so please don't give up on me!

I use Firefox and have no issues that way, but when trying to view my blog in IE, it freezes the computer and IE shuts down. I can't even begin to tell you how much I hate IE. I have used Mozilla and then Firefox for ages with no problems, ever.

Trying my best and please wish me luck! And if you feel like it, check out Firefox. You won't believe all the stuff you can do with it, and I'll bet you'll like it more than IE. ;)
xoxo
Elle


EDIT: I think I have it figured it out! Please let me know if you're trying to view with IE and it still isn't working.

Turns out it was a widget. If anyone is having the same problem, email me!

Stumble Upon Toolbar

Wednesday, June 11, 2008

It's Wednesday! Do you know what that means?

Great island Common on the seacoast in New Castle, NH. Isn't it gorgeous there? The day I took this was just like today's weather--sunny and in the 70's. I'd love to be under that tree right now with a good book.

Neither do I. I was hoping some of you might. At least it's cooler today! We're currently at 74°, which is fine by me. We'll still be getting some warmer than usual weather later in the week, but for now, I'm totally enjoying this. It was so hot last night that I didn't even cook anything. We had roasted red pepper hummus and summer salad with whole wheat pitas and feta. So good, and no heating up the kitchen!


I've got a couple of recipes to share today. One is for a most delicious salad, created by Jerry at Cooking by the Seat of my Pants. You should check out his blog--he has great food to drool over. Jerry came up with this recipe for the Royal Foodie Joust sponsored by Jenn, The Leftover Queen, at the Foodie Blogroll. Please check her blog out, too, and if you haven't joined the blogroll yet, have a look around!


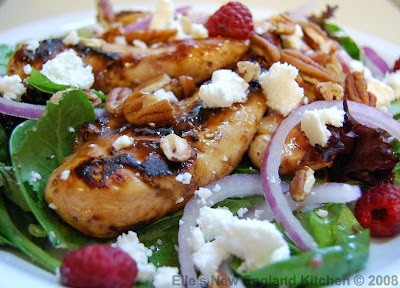
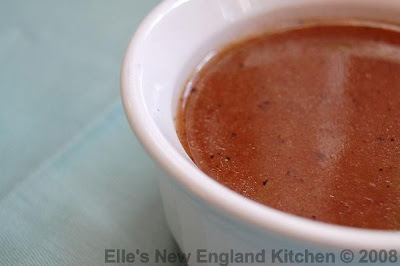
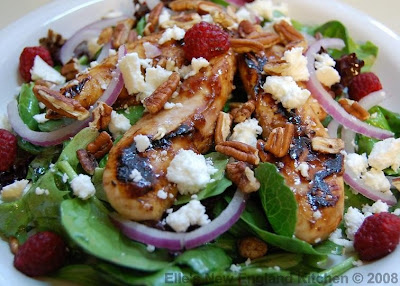
Since I won the previous joust, I got to pick the three required ingredients for this one, and those were...surprise! raspberry, lime and almonds. The jousters came up with such great recipes to feed my addiction, hehe. (It's almost like I had minions catering to my raspberry and lime whims!) I had to try the salad, not only because it looked delicious and had my favorite things in it, but because it's got my name on it! I think if something's named after you, it's a given--you've got to make it. It's so good! And will be a regular around here this summer. The dressing is tangy and not too sweet, the chicken is tender and nicely flavored, and all the extras in it come together to make one great meal. I couldn't find any sliced almonds at the store, so I used pecans--also delicious. The vinaigrette is like any dressing, to taste--I ended up adding a bit more raspberry jam (Trader Joe's low sugar jam) and lime juice. Actually, I just about doubled it so we'd be sure to have enough. I also added some fresh raspberries to the salad.


This one's definitely going to be on the menu again soon, and I hope you'll all check it out!
Almost forgot to link to the salad! D'oh! La Salade d'Elle (Chicken Salad with Almonds, Queso Fresco, and Raspberry Lime Vinaigrette.)


Next recipe! I must warn you, these pictures you're about to see aren't pretty. But! It won't matter because the food is so freaking good! It's typical baseball park, tailgating, or street food. So funny, because it's such a simple thing to make, but for me, it's such a treat. I'm like a little kid when we have these. So is my husband! He's happy when we have this. It's easy to feed a crowd with these, too, or cut back and make a smaller batch if you like. You can do these in the house, as I've done here, or on the grill, with a pan so you don't lose stuff to the coals. Either way, it's goooood eating!

Sausage, Peppers and Onions

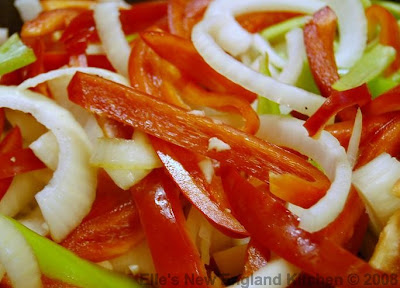
For this batch, I used Sweet Italian Sausage, ten of them. They were on sale, what can I say? Normally I don't make ten at a time, but they're still so, so good the next day. I used three red bell peppers--use whatever color peppers you want, and two longish light green peppers. No idea what they were, but they were sweet, not spicy. I also used two large sweet onions, and about seven or eight cloves of garlic.


10 Sweet (or hot, if you like) Italian Sausage; you could also use chicken or turkey sausages
5 sweet bell peppers, any color, sliced into long strips
2 large sweet onions, sliced
7 cloves garlic, minced
vinegar (I usually use white wine vinegar, but use whatever kind you have)
fresh cracked black pepper and salt if you taste and think it needs some
sandwich rolls
yellow mustard (you can use spicy mustard if you want, but the best way to enjoy these is with good old yellow mustard)


In a large pan on medium heat, brown the sausages, about 3 minutes on each side, for a total of about 12 minutes.
Remove from pan and set aside to cool a bit, drain most of the oil from the pan.
Add the peppers, onions, and garlic, and saute until they get soft, but don't brown them too much. Stir them around occasionally for even cooking. You can add a little olive oil if you need to.

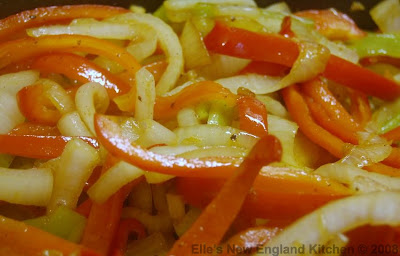
Before!


After!


While the peppers and onions are cooking, slice the sausages almost all the way through lengthwise, but leave one end intact so you can open them up, like this:

See? I told you these weren't pretty.

Add about 1/4 cup or so of vinegar to the onions and peppers and stir to coat evenly.
Open up the sausages and place them over their bed of peppery-oniony-vinegary goodness.


Cover the pan and lower the heat to medium low for about 10 minutes.
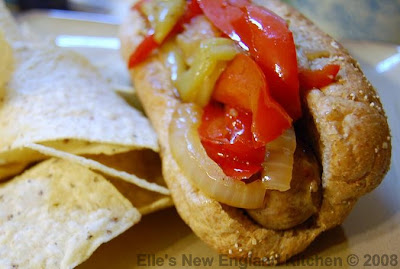
Serve in buns with yellow mustard, and lots of napkins. Street food is messy food.

Servings depend on the size of the sausages. Yes, size matters. We had stubby ones and needed two per bun. God, I can't believe I just typed that, hehe!

Doesn't have to be pretty to be freaking delicious!


Click on the widget to print the recipe.

Italian Sausage Sandwiches with Peppers and Onions

This is one of our favorite treats! Think ballpark, street ...

See Italian Sausage Sandwiches with Peppers and Onions on Key Ingredient.


Stumble Upon Toolbar