Mmmmm, mint and chocolate. As good as, maybe even a little better than peanut butter and chocolate? I don't know, that's a tough one. Given a choice with chocolate--I'll almost always go with mint.
I was grocery shopping and saw that they had Andes Mints on sale. Pass those up? No way. I knew I wanted to bake something with them. It was either that, or be faced with eating all of them. Cookies immediately came to mind. I did a search and found that there was pretty much one Andes cookie recipe. The one where you place a whole candy over the hot cookies and let it melt there, which looks good. Then there's this one, from Erin. That looks great too, right?
But I wanted to do something different. I started with a basic chocolate cookie, but instead of chocolate chips, I chopped up the mints, coarsely, so you get chunks, and added those to the batter. The result? Delicious cookies! You can immediately taste the mint in them, which is good. Some of the chocolate melted directly into the cookies. They are a cakey cookie, which isn't my first choice, but still, they're very good--almost like little brownie bites. Everyone still loves them--I can see right now that our supply of them is almost gone, so that's a good indication of yummy cookies.
Next Time:
I'd definitely leave larger chunks of the mints. I cut each one into roughly three pieces, so maybe just cut them in half next time.
I'll probably search out a chocolate cookie base that'll be chewier, since that's my favorite kind of cookie.
All in all, I'd make these again for sure, just tweaking the cookie part. But if you like soft, cake-like cookies, you'll love these!
To print this recipe, click here!
makes approx 60 cookies
1 cup butter (2 sticks), softened
1 3/4 cups sugar
2 eggs
2 tsp vanilla extract
3 cups all-purpose flour
2/3 cup unsweetened cocoa
1 tsp baking soda
1 tsp salt
1/2 cup milk
2 (28 piece) boxes Andes Mints, coarsely chopped 
Heat oven to 375.
Beat the butter, sugar, eggs and vanilla in mixing bowl until fluffy.
Combine the flour, cocoa, soda and salt, then add alternately with the milk--blend well.
Stir in the mints.
Drop by teaspoons on parchment covered baking sheets.
Bake 8-10 minutes--don't over bake!
Cool for a minute on the sheets and remove to cooling racks.

Monday, December 22, 2008
Chocolate Minty Cookies and Holiday Wishes
Monday, December 15, 2008
Holiday Baking, Week 5: The EASIEST Chocolate Truffles you'll ever make

I know, it's not really week 5, more like 8 or 9, but...stuff happens. Hopefully, this easy--but incredibly delicious recipe will make up for it!
I've made chocolate truffles before, and I wouldn't say they're hard to make, but messy. These are simple, but not messy at all. They're even easier than making fudge, I swear! And anyone lucky enough to be gifted with some of these will love you forever. But don't let them know how easy it is--let them think you're a chocolate making genius. Let them offer to do something for you, in return for some of your amazing truffles, lol!
This one is from Donna Hay's Christmas book. If you don't know Donna Hay, you should! Her recipes are simple, but fantastic. I dare you to look through one of her books and not find 30 recipes that you want to try immediately.
This has two ingredients. Well, three if you count cocoa for dusting the truffles. Ok, four if you add Raspberry Chambord, like I did. Not in the original recipe, but I couldn't resist! But still, that's only four ingredients for decadent chocolates that you can use to bribe your friends.
Are you ready for this extremely complicated recipe? Let's go!
Chocolate Truffles
by Donna Hay
To print this recipe, click here!
1/2 cup heavy cream
10 1/2 oz dark chocolate, chopped
cocoa powder for dusting
if you're adding another flavoring, like the Chambord--about 3 TBSP
In a saucepan over medium heat, bring the cream to almost a boil.
Add the chopped chocolate and stir for one minute.
Remove from heat and stir until completely smooth.
Stir in the Chambord, or your choice of liqueur. This is optional, but so, so good in the finished truffles!
Pour into a square pan (her recipe says 6", but I only had and 8" pan, and it was fine) that you've greased and lined with parchment paper. Don't grease the paper. I cut two sheets of parchment to fit, one sheet going one way, the other going the opposite way, so there were "handles" for lifting on each side.
Refrigerate for two hours or until firm.
To serve, lift the truffles out with the paper, cut into squares, and dust with cocoa powder.

Let them come to room temp for about 20 minutes before you serve.
Will keep in fridge for 10 days.
Now how easy is that? And just wait till you taste them! And yeah, they're not round, but then again, you didn't have to get messy rolling them, did you? ;)

Stay tuned for another giveaway, coming very, very soon! It's something that'll make cooking during the colder months a little more convenient...and a lot tastier, too.
Wednesday, December 10, 2008
Leftover Cranberry Sauce? Yogurt Cranberry Coffeecake!

So, I had all of these good intentions for making cranberry sauce at Thanksgiving. I even looked around and found a recipe I was going to mess around with and change up. Made my T-Day grocery list, and headed off to Trader Joes...
Wouldn't you know, they had their own cranberry sauce in the refrigerated section--regular and cranberry-orange. So yeah, good intentions and recipes went right out the window, and I picked up a container of each. Ingredients? Water, cranberries, sugar, orange--pretty much it. And one less thing to make on T-Day. Woo!
We opened the plain one first, and dear Lord, it was perfect! It didn't need spices, or alcohol, or nuts--it was amazing in it's simplicity. I could have eaten that entire thing myself! We didn't get around to the orange one, though, so back in the fridge it went.
I knew I wanted to make something with the sauce, and a quick search brought me to this recipe from King Arthur Flour: Yogurt Cranberry Coffeecake. You know me, I love using yogurt in baked stuff! I read the reviews, and it seemed the consensus was to add more cranberries, so of course I did. More fruit filling? Um, yeah, I'm all over that one! I used about 1 1/2 cups, which completely covered the bottom layer. So now you get fruit in every single bite, like it should be, right? That's a no-brainer. The streusel topping is fantastic--cinnamony and not too sweet. The cranberries add their signature tart/sweet flavors, and the bottom cake layer is moist and just right on the sweetness. Don't forget, there's yogurt in there, so it's anything but dry. 
This is my dream coffeecake. Fruity, tender and moist, and not too sweet. It doesn't need a glaze over the top to cover up dry cake on the bottom. AND, it makes a lot. A whole 13x9 pan. So you can share--or not, lol. I don't know how it freezes, but I don't see why you couldn't cut the recipe in half. And I also think this would make amazing muffins, which I'm definitely trying soon!
Click here for the recipe, and after you get that, have a look around and try not to add $200 of stuff to your shopping cart. But the best part--it's all useful stuff, so you can totally justify it. ;)
Tuesday, December 9, 2008
100th Post Cookbook Winner
The Random Number Generator has spoken and the random winner is comment #70, Dawn from Vanilla Sugar.
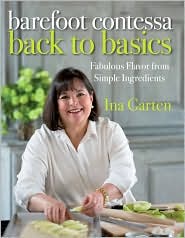
Dawn will be receiving a copy of Ina Garten's brand-spankin' new book Back to Basics.
Congratulations, Dawn! All I need is your address so I can get the book out to you. :)
Stay tuned for more giveaways, because there are more coming!
Sunday, December 7, 2008
Chocolate Cake, Marry Me!

Yes, I'll be Mrs. Chocolate Cake, ok? Think my husband will mind? He can be Mr.- Mrs. Chocolate Cake.
This cake. This cake....oh my goodness. Anyone that knows me, knows that my favorite kind of cake is chocolate. So for my son's birthday, I asked him what kind of cake he wanted. Is it wrong that I totally steered him toward chocolate cake with chocolate frosting? (Don't worry. He loved. This. Cake.) We had the idea of making a giant sort of Ring Ding cake. I know, some of you might not know what a Ring Ding is. Poor souls, hehe.
Anyway, I had the killer cake recipe, and I had the killer frosting recipe, but I needed a filling recipe. I was in a hurry, and looking back, wish I took more time to find a good recipe for that, too. Don't get me wrong, the one I used is delicious, but not great for layering between two big cake layers. I used a whoopie pie filling that I'd used before...for whoopie pies, of course. It didn't hold up well to the cake layers, and before I knew it, I had a cake slide going on. Damn.
But I kept on. I poked a couple of chopsticks through the top and stuck it in the fridge to try and set it more. After 20 minutes or so, I frosted the sides with the chocolate frosting and set it back in the fridge. When I frosted the top a little later, it was still sliding, so the chopsticks went back into the top.
And you know? When it was time to serve it, it was a little lopsided, but it was for family, and they don't really care. Thank goodness, right? lol!
The cake recipe is from Epicurious. I can't even say enough good things about the cake. It's easy to make, it's dense and chocolaty, it's moist, and most important, the taste is out of this world! It's my new official chocolate cake recipe. It's my new best friend.
The filling is also from Epicurious. I've made these whoopie pies before and they're another great recipe. Unfortunately, the filling just doesn't hold up to heavy cake layers. Whoopie pies? Yes! Cake filling? No!
And you can't have cake without frosting, can you? I don't make frosting very often, but when we do have frosting, it's this one. It's perfect, like the recipe title says. I got this recipe from a friend a few years ago, and haven't made another one since. It's incredibly simple, but homemade--so it tastes great. It's dark and chocolaty, and nice and creamy--good for spreading on cake. Please don't skip the sifting the sugar step--you don't want to have lumpy frosting, do you?
Perfect Chocolate Frosting
6 oz. semisweet chocolate
1/2 cup heavy cream
1 cup butter, cut into tablespoon sizes
2-1/2 cups confectioners' sugar, sifted
Place a large bowl, filled halfway with ice, in the sink (a bowl that is large enough to hold the pot that you will cook the frosting in).
In a medium size pot over med low heat; melt chocolate, cream, and butter.
Stirring constantly, cook the mixture until all of the butter and chocolate melts and thickens, about 5-6 minutes. Do not boil.
Remove pot from heat.
Whisk in the sifted confectioners' sugar until mixture becomes smooth (approximately 1 minute). Put the pot on top of the bowl of ice. (Be careful to not allow any ice from the larger bowl to get into pot with the chocolate mixture.)
Beat with an electric mixer on low speed for 4-5 minutes until frosting becomes smooth, thick, and fudgy. Remove from ice.
Spread onto cooled cake layers.
The frosting will thicken as it sets up.
If the frosting gets too hard to spread, put back on low heat and stir constantly until you get the spreading consistency desired. 
So even with the leaky filling, this cake was awesome. My son kept thanking me for making him such a great cake for his birthday, and my other son has requested the same one for his birthday. Hopefully I'll find a sturdier filling by then!
That's it. No more talking. I'll show you how good this cake was.
**Warning! The following images may not be suitable for those of you with good table manners. Notice that one kid isn't even bothering with the formality of a utensil.


I think if I'd tried to get a bite of that slice, I'd have lost a limb. That was the last slice of cake, by the way. I had a flock of vultures hounding me the entire time I was taking photos, one even had a fork at the ready! That last series of pictures happened over a period of about 45 seconds. Piggies.
Thursday, December 4, 2008
My Search (for the best corn muffins) Is Over

The muffin gods have shown me the way. And so did Dawn at Vanilla Sugar. She posted a little while back about Chocolate Cinnamon Scones by Gale Gand, which reminded me that I've got one of her cookbooks in my ginormous cookbook collection.
It's not that I didn't like the book, but you know how it is. You buy a cookbook, read it cover to cover, earmark a bunch of recipes, and then forget all about them. So I went and pulled it from the shelf to give it another look and found her recipe for Featherlight Corn Muffins.
Holy mother of moist muffins (that sounds so wrong, lol!), these are P-E-R-F-E-C-T. Just sweet enough (I like sweet corn muffins, not tasteless muffin-shaped hunks of sawdust.) and so moist. I will never try another corn muffin recipe. Ever. I'm serious! 
Featherlight Corn Muffins
by Gale Gand
1 cup AP flour
1/2 c yellow cornmeal
1/4 c sugar
1 1/2 t baking powder
1/4 tsp salt
2 eggs
1/4 c milk
1 stick unsalted butter, melted (I doubled this recipe and used 4 oz Greek yogurt instead of 2 sticks butter)
Oven to 350.
Grease or line 8 muffin cups.
Sift dry stuff together.
Whisk eggs and milk in large bowl.
Add a third of the dry stuff to the egg mixture, then a third of the butter, stirring gently just until incorporated.
Repeat with remaining dry stuff and butter--don't over mix.
A little flour not mixed in at the end is fine (she says-but I always mix everything in, lol).
Use an ice cream scoop, filling muffin cups half full.
Bake about 15 mins, till risen, light golden brown, and firm to the touch.
Let cool about 15 mins in pan.
Now take one and try a bite. I promise you'll devour it and go back for more.
Do you hear that? It's a choir of angels singing in your ear. They're singing about the end of dry corn muffins!
Don't forget to enter my giveaway! You've got until December 8th!


Oh my gosh my dumb computer crashed 2 years ago and I lost all my settings, bookmarks, addresses, etc.... Thankfully I did back up and didn't lose any work. I really think computers are only meant to last 3-5 years as so many people lose their computer after this about of time.
Congrats on 100th post. Wild huh? And I do remember those skillet smashed taters, vividly...I fell in love with them.